Scottsdale Shower Remodel
High-End Shower Renovation in Scottsdale & Nearby
Your Scottsdale shower remodel project can be next. Also serving select areas in Paradise Valley, Cave Creek, Carefree, Fountain Hills, Rio Verde, Glendale, Peoria, New River, Anthem, Phoenix, ...
 480-400-4300
For Your Scottsdale Shower Remodel Project, Call/Text Mark:
480-400-4300
- Trust
- Reliability
- Safety
- Quality
- Licensed
- Bonded
- Insured
- Home improvement for Scottsdale and nearby
Scottsdale Shower Remodel - Main Steps From Old To New Shower
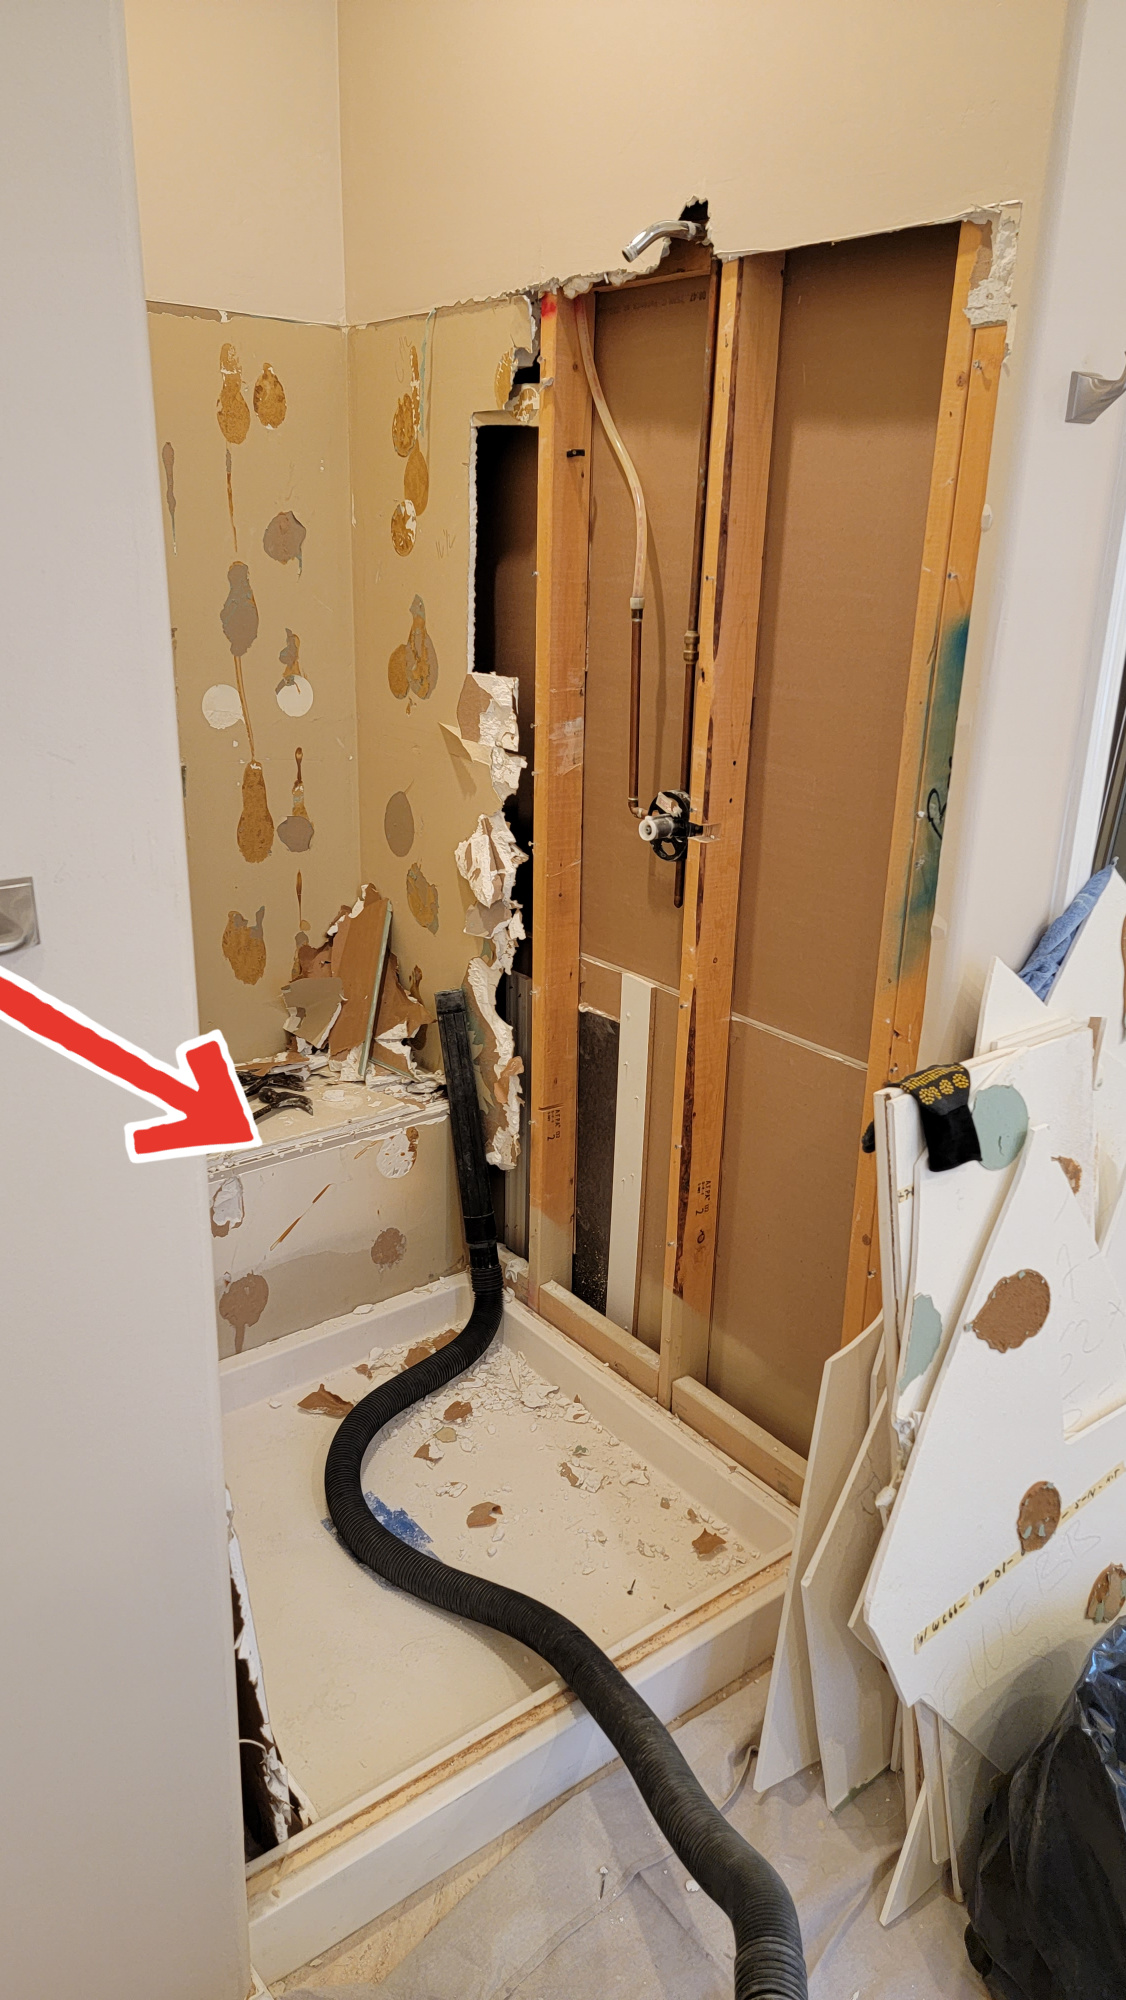 Old shower demolition and removal.
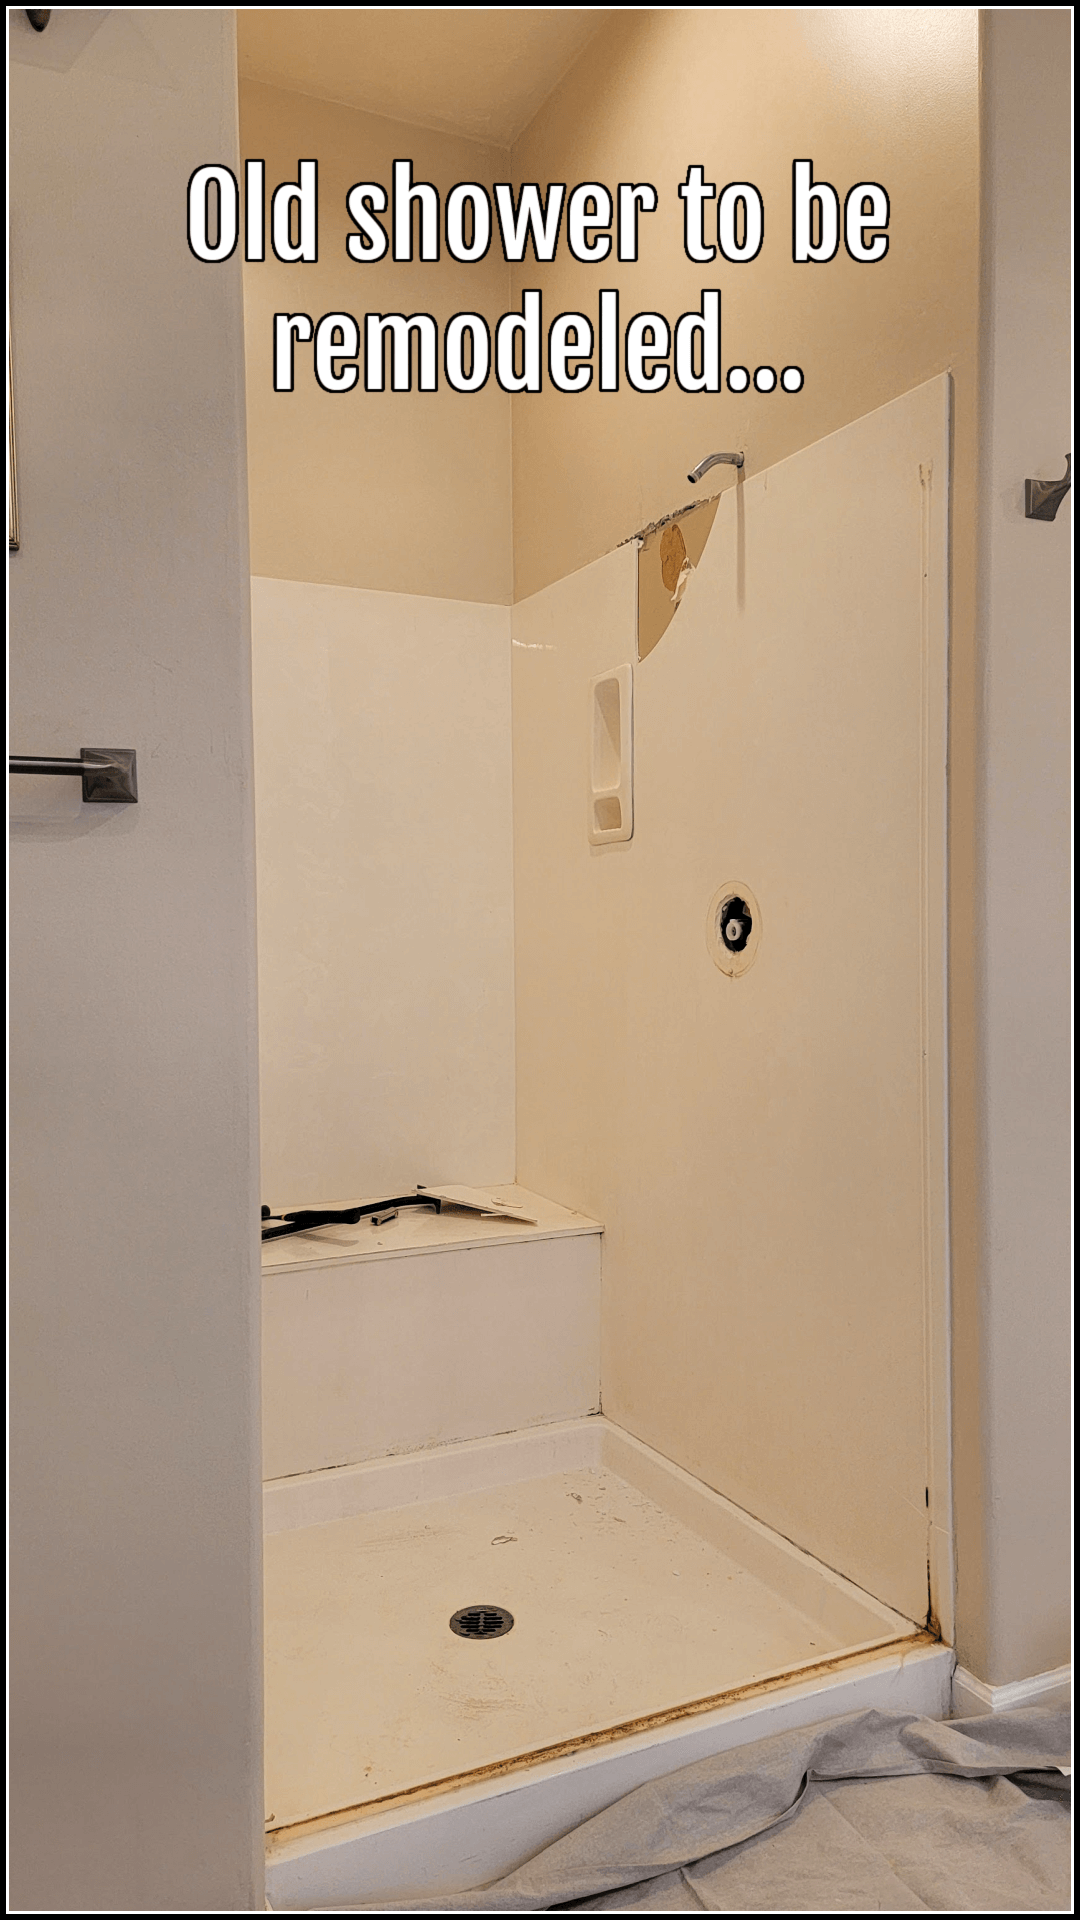
It all starts with removing the old shower faucet, shower head, tearing down the shower walls - be that old tile or the old cultured marble, prefab or even a fiberglass enclosure.
In this case, we're also removing the old shower bench (see arrow) as the homeowner doesn't want it anymore and prefers a bigger shower floor.
Given that the shower drain is centered in the middle of the current shower floor, the homeowner wants the drain to be moved and centered on the new bigger floor after taking out the bench.
The shower walls are big pieces of cultured marble that was installed on top of the drywall which will also be removed down to the wood studs.
The shower base is a one-piece and is extremely heavy. The shower plumbing will be completely re-done.
Scottsdale Shower Remodel - re-center the drain pipe
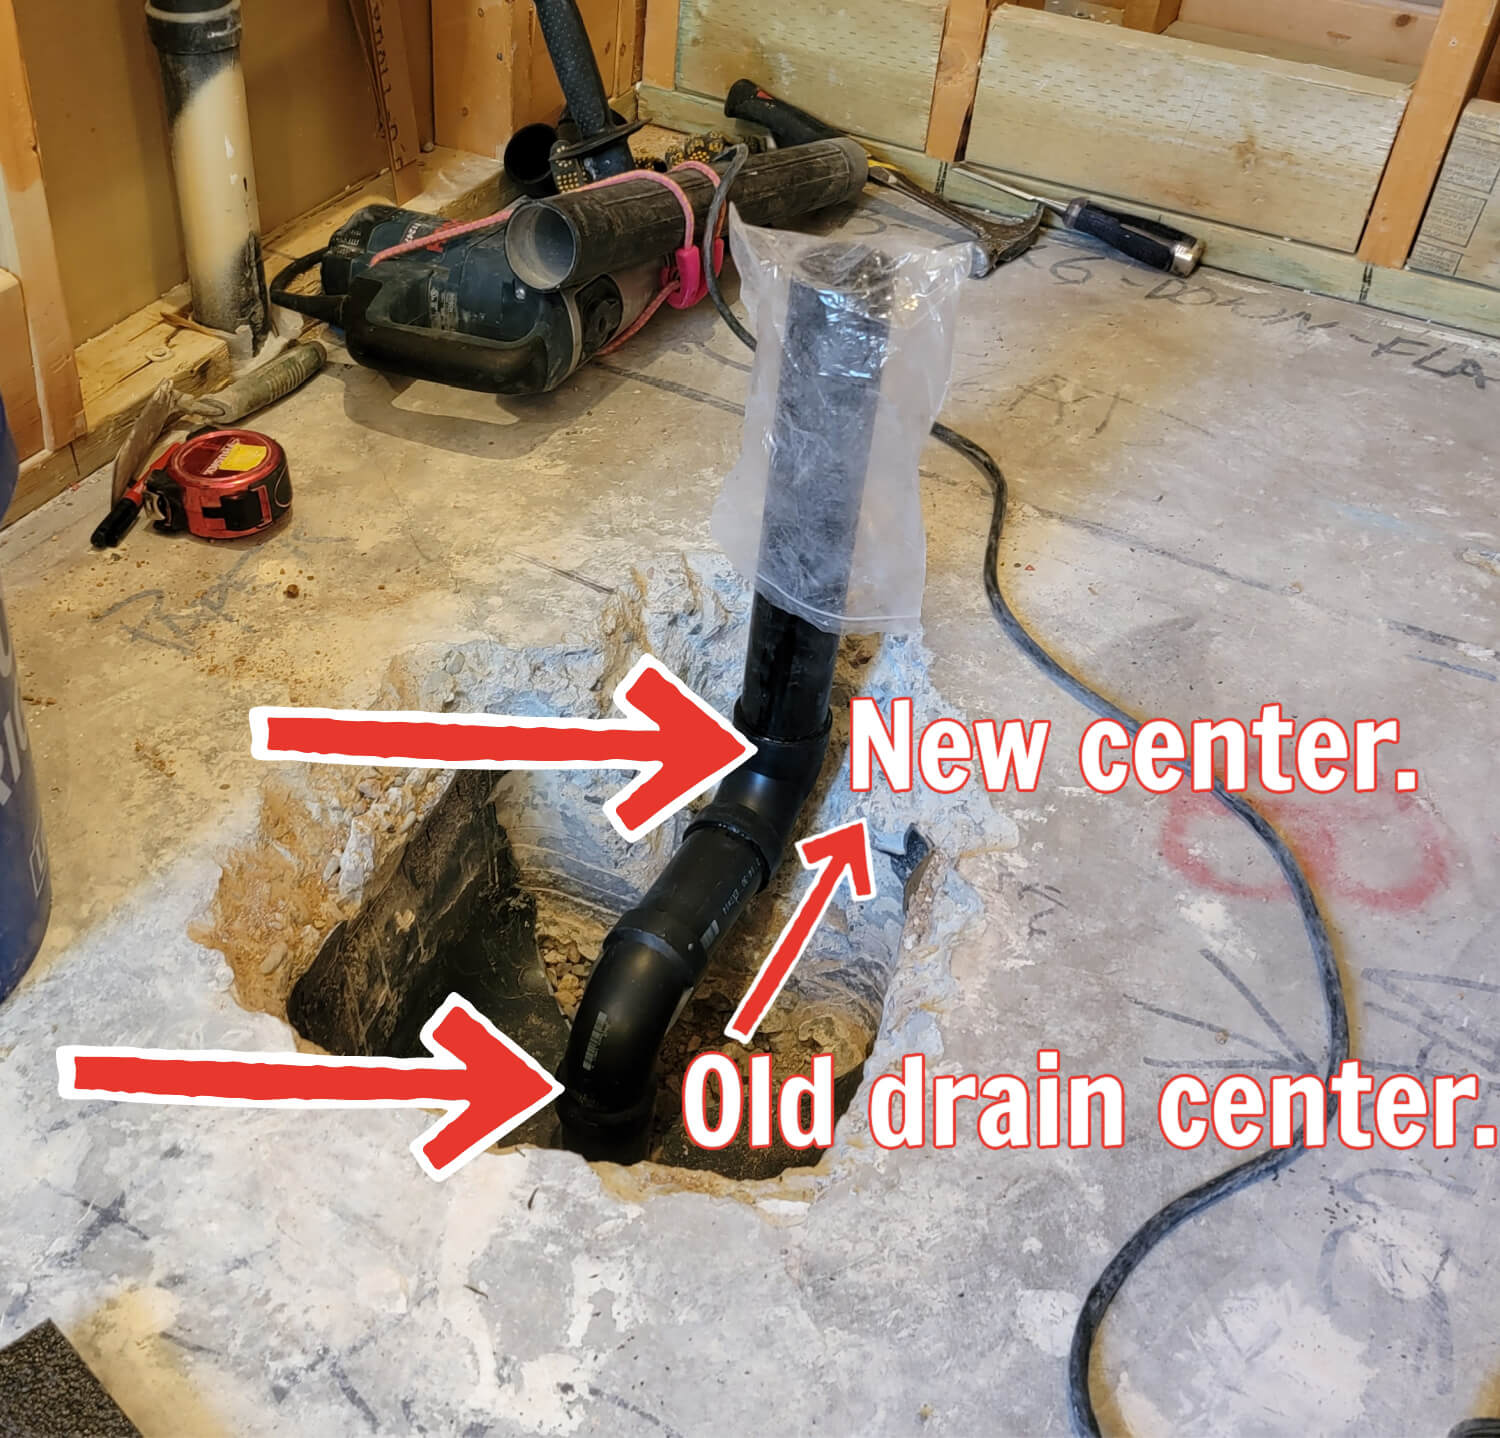 Move drain pipe to new center.
After the shower bench was removed, the shower floor is now bigger and that means the old drain position is not centered on the floor.
The plumber got to work and after breaking some concrete to make room for the ABS pipe, the drain was perfectly centered within the new shower floor size by moving the drain about 10" toward the back of the shower.
Scottsdale Shower Remodel - rough plumbing for shower faucet
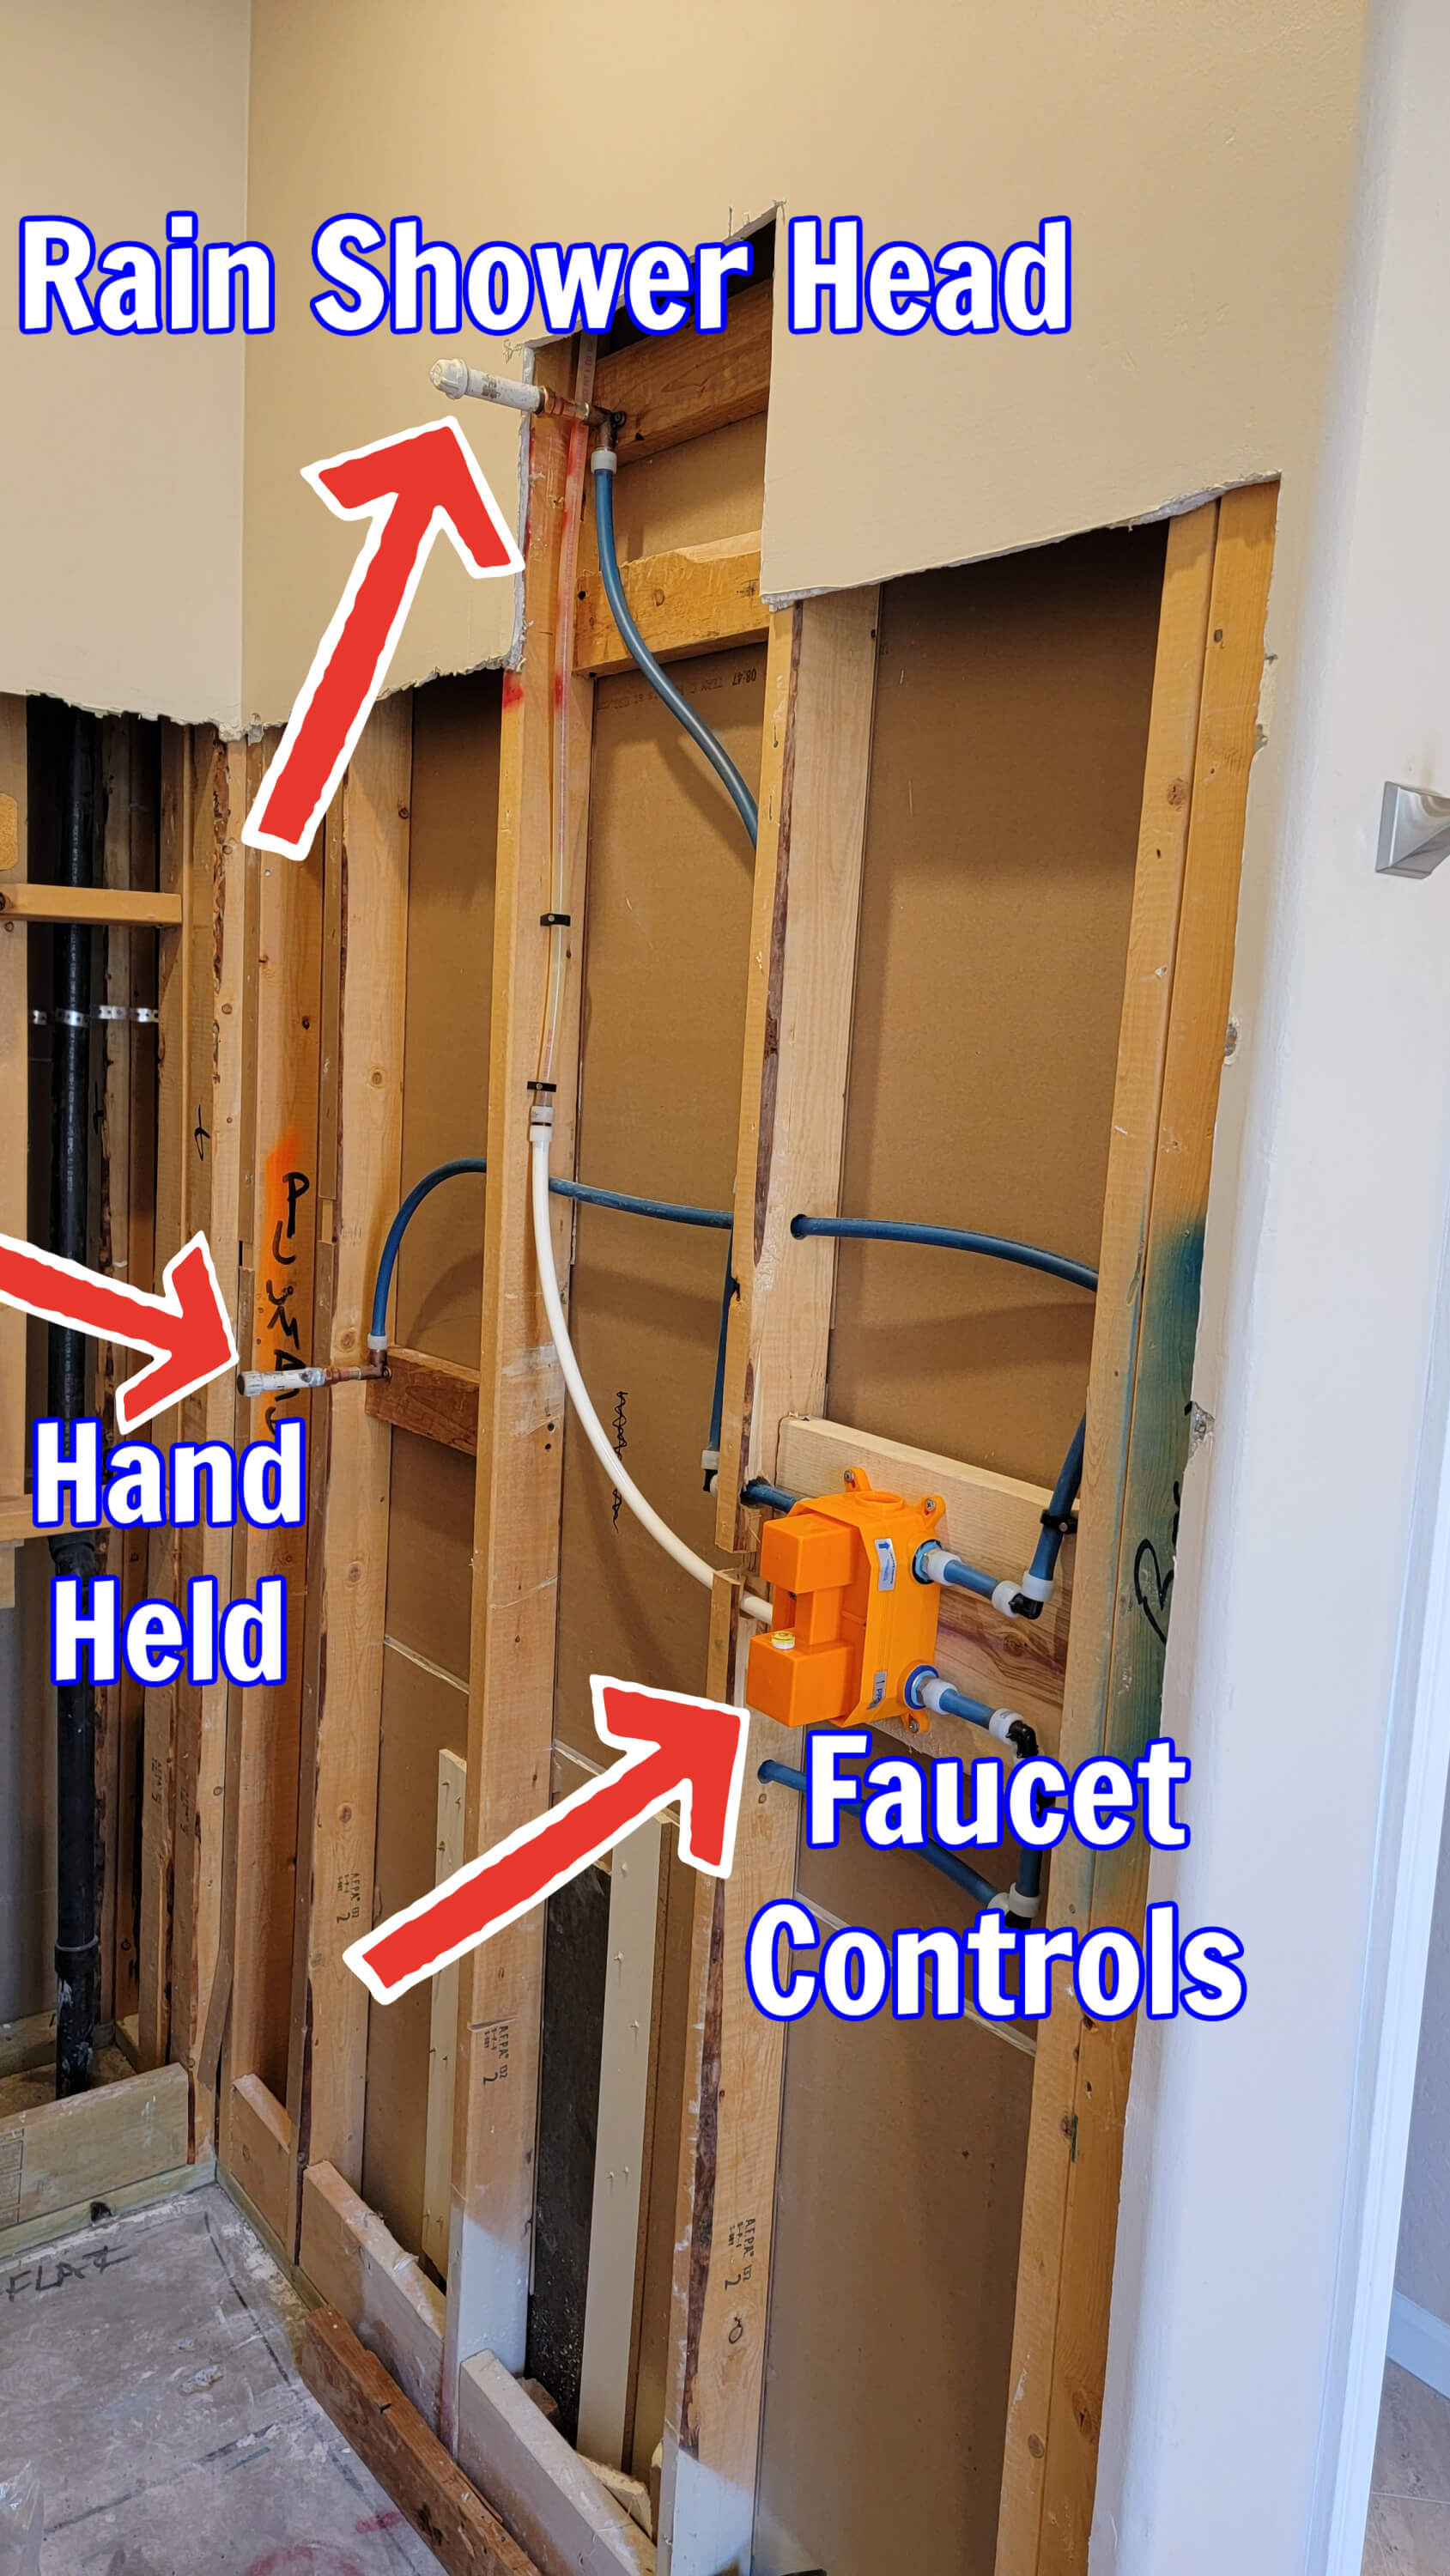 Rough plumbing for shower.
The rough plumbing for the new shower faucet has the main controls installed close to the shower entrance so they are within easy reach from outside of the shower.
One reason for that is to allow you to turn the water on before actually stepping into the shower (which can come in handy in those cases where warm water needs a minute to reach the shower).
Much deeper in the shower, we'll have a removable hand held device (sprayer) which allows flexibility as needed.
To top it off, there will be a rain shower head and this particular one will come out of the wall, not the ceiling.
More drywall will be cut above the shower head all around the walls because the tile will go up to about 7.5 ft high.
Scottsdale Shower Remodel - self leveler for shower floor
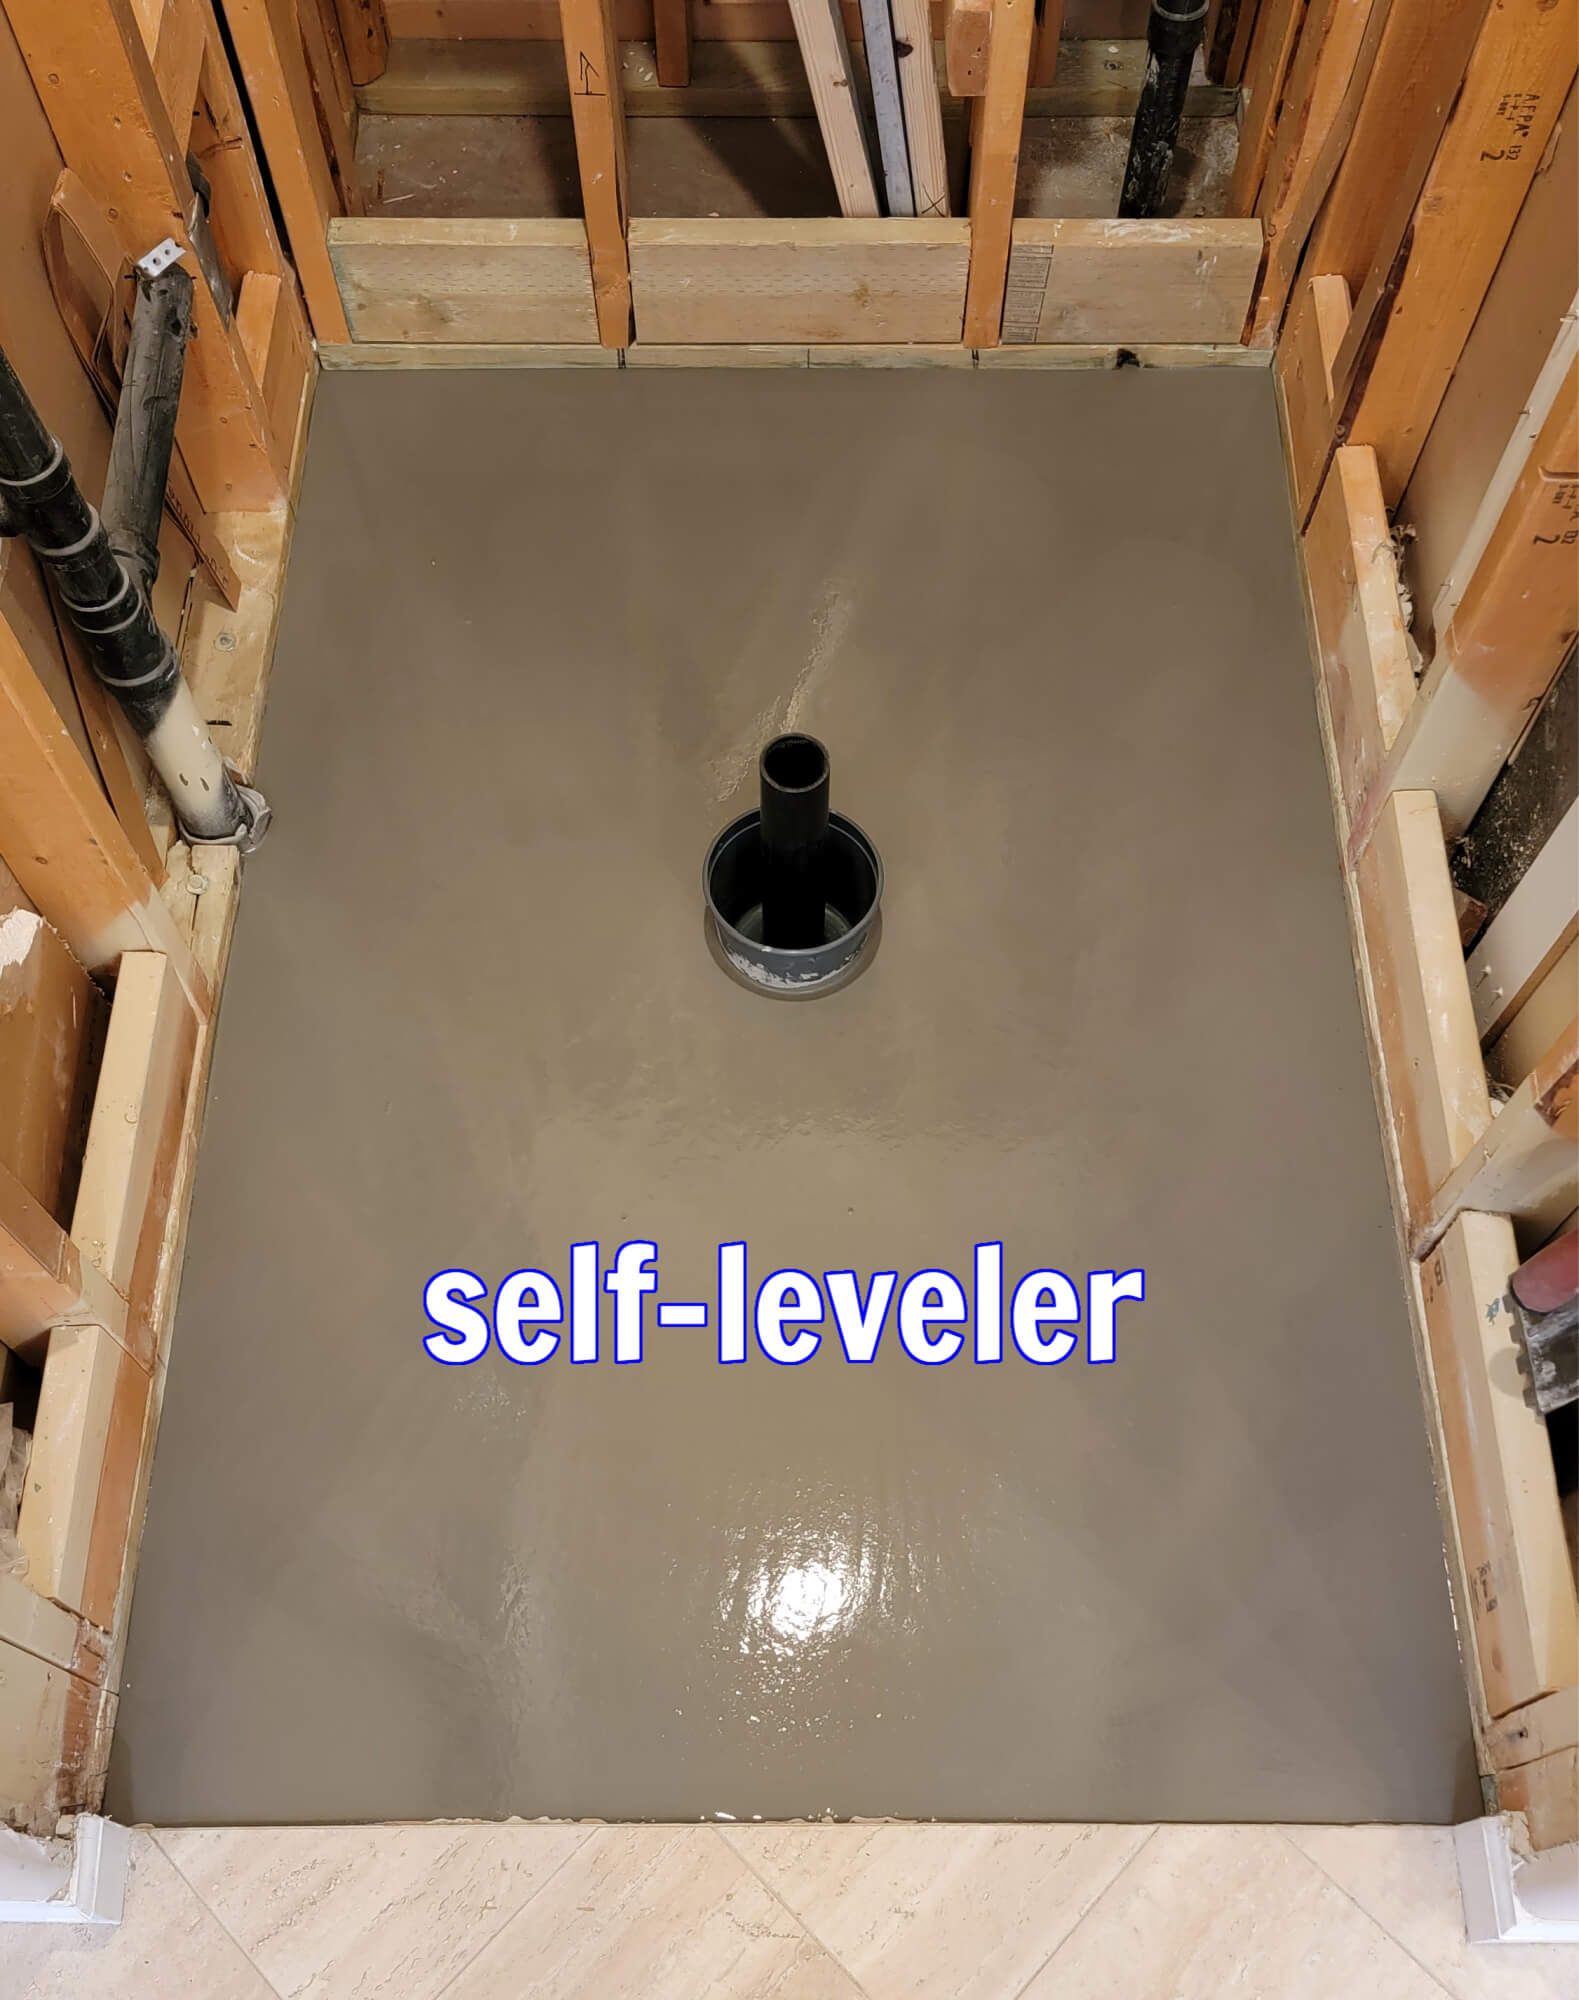 Self leveler on shower floor.
We'll be using a high quality waterproofing product called WEDI (Made in Germany). It comes as boards of different thicknesses, pre-pitched shower bases of many sizes, shower curbs, niches, etc.
The concrete shower floor must be flat and level to be ready for the WEDI shower base so we poured the gray self leveler you see in the picture and let it dry overnight.
The next day, the wedi shower base has to be carefully installed with thinset on the now-level shower floor.
Scottsdale Shower Remodel - wedi boards, curb, shower base
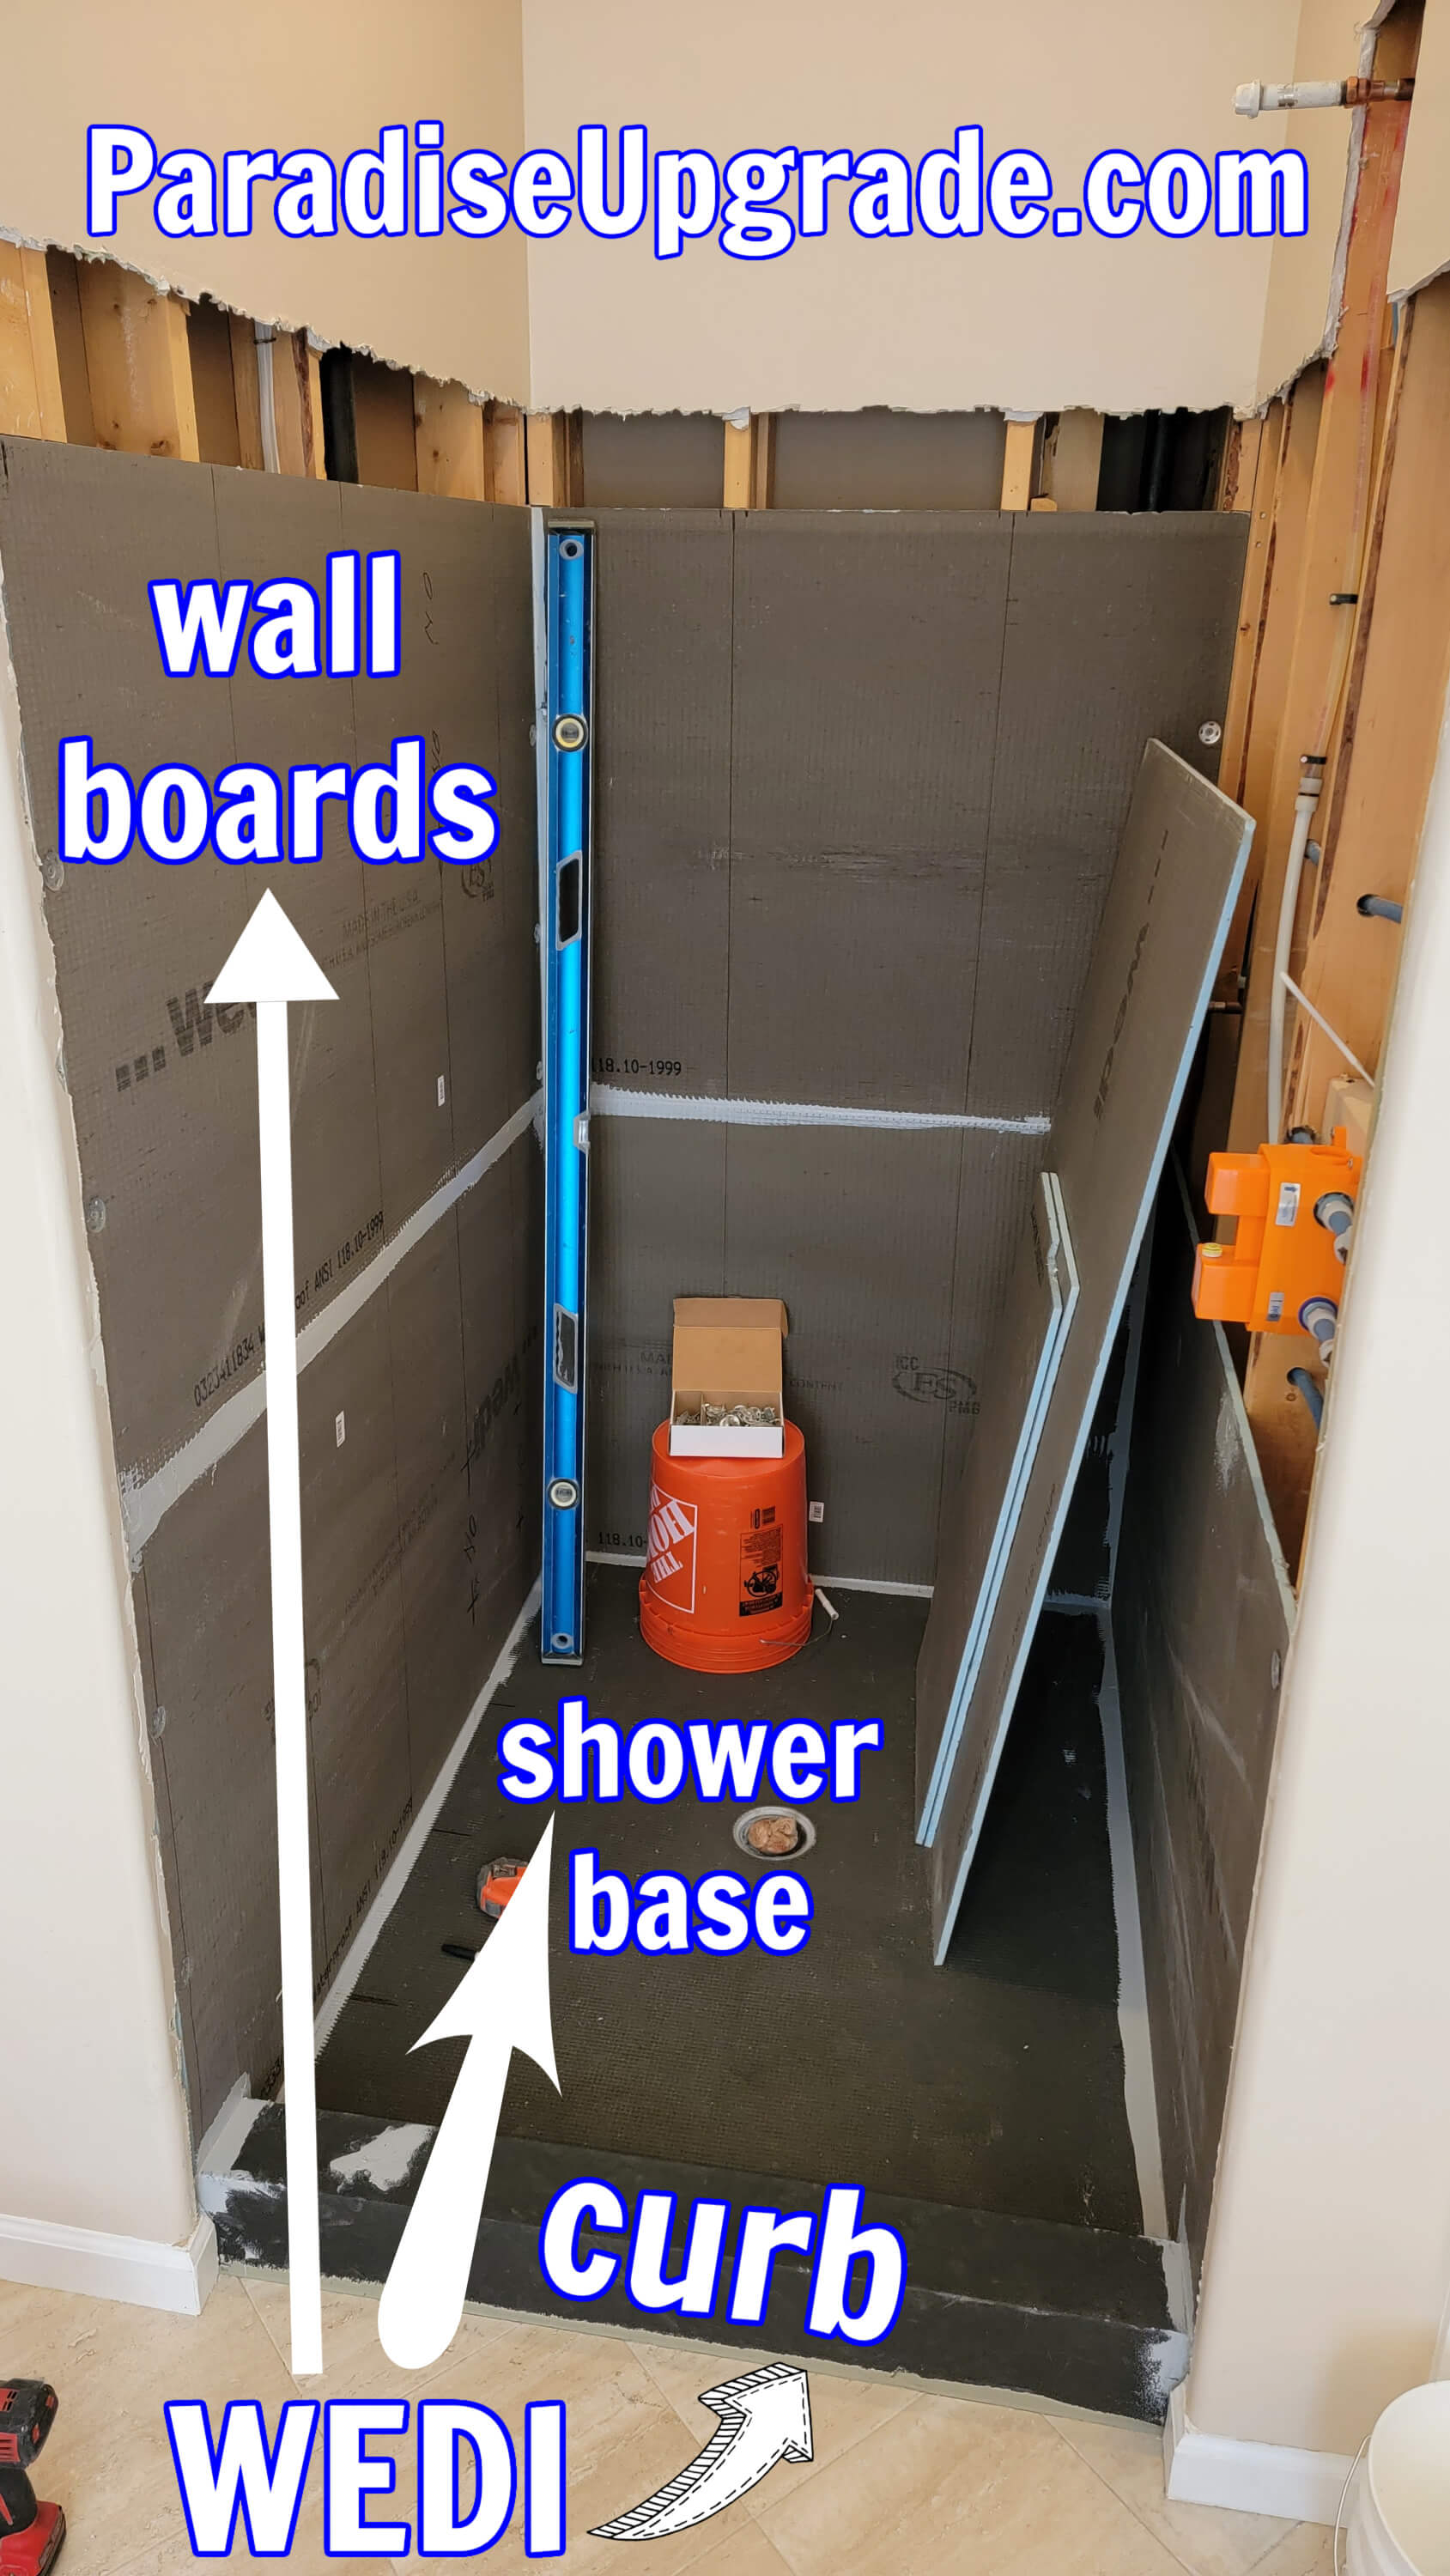 Wedi boards, curb & shower base.
After installing the wedi shower base, progress was made on the wedi boards and even the curb was already installed.
See WEDI products on Amazon.
See WEDI products at The Tile Shop.
We still have to cut at least another foot of drywall at the top all around the walls since the tile will go that high up on the walls.
There's a specific blue sealant from wedi that is used to waterproof the seams between boards and also goes over the screws and washers, also provided by wedi.
There will be a custom size niche on the back wall of the shower and that will be cut later on into the wedi board and custom built to have full travertine tiles around the edges of the niche.
Scottsdale Shower Remodel - the plan for a custom niche
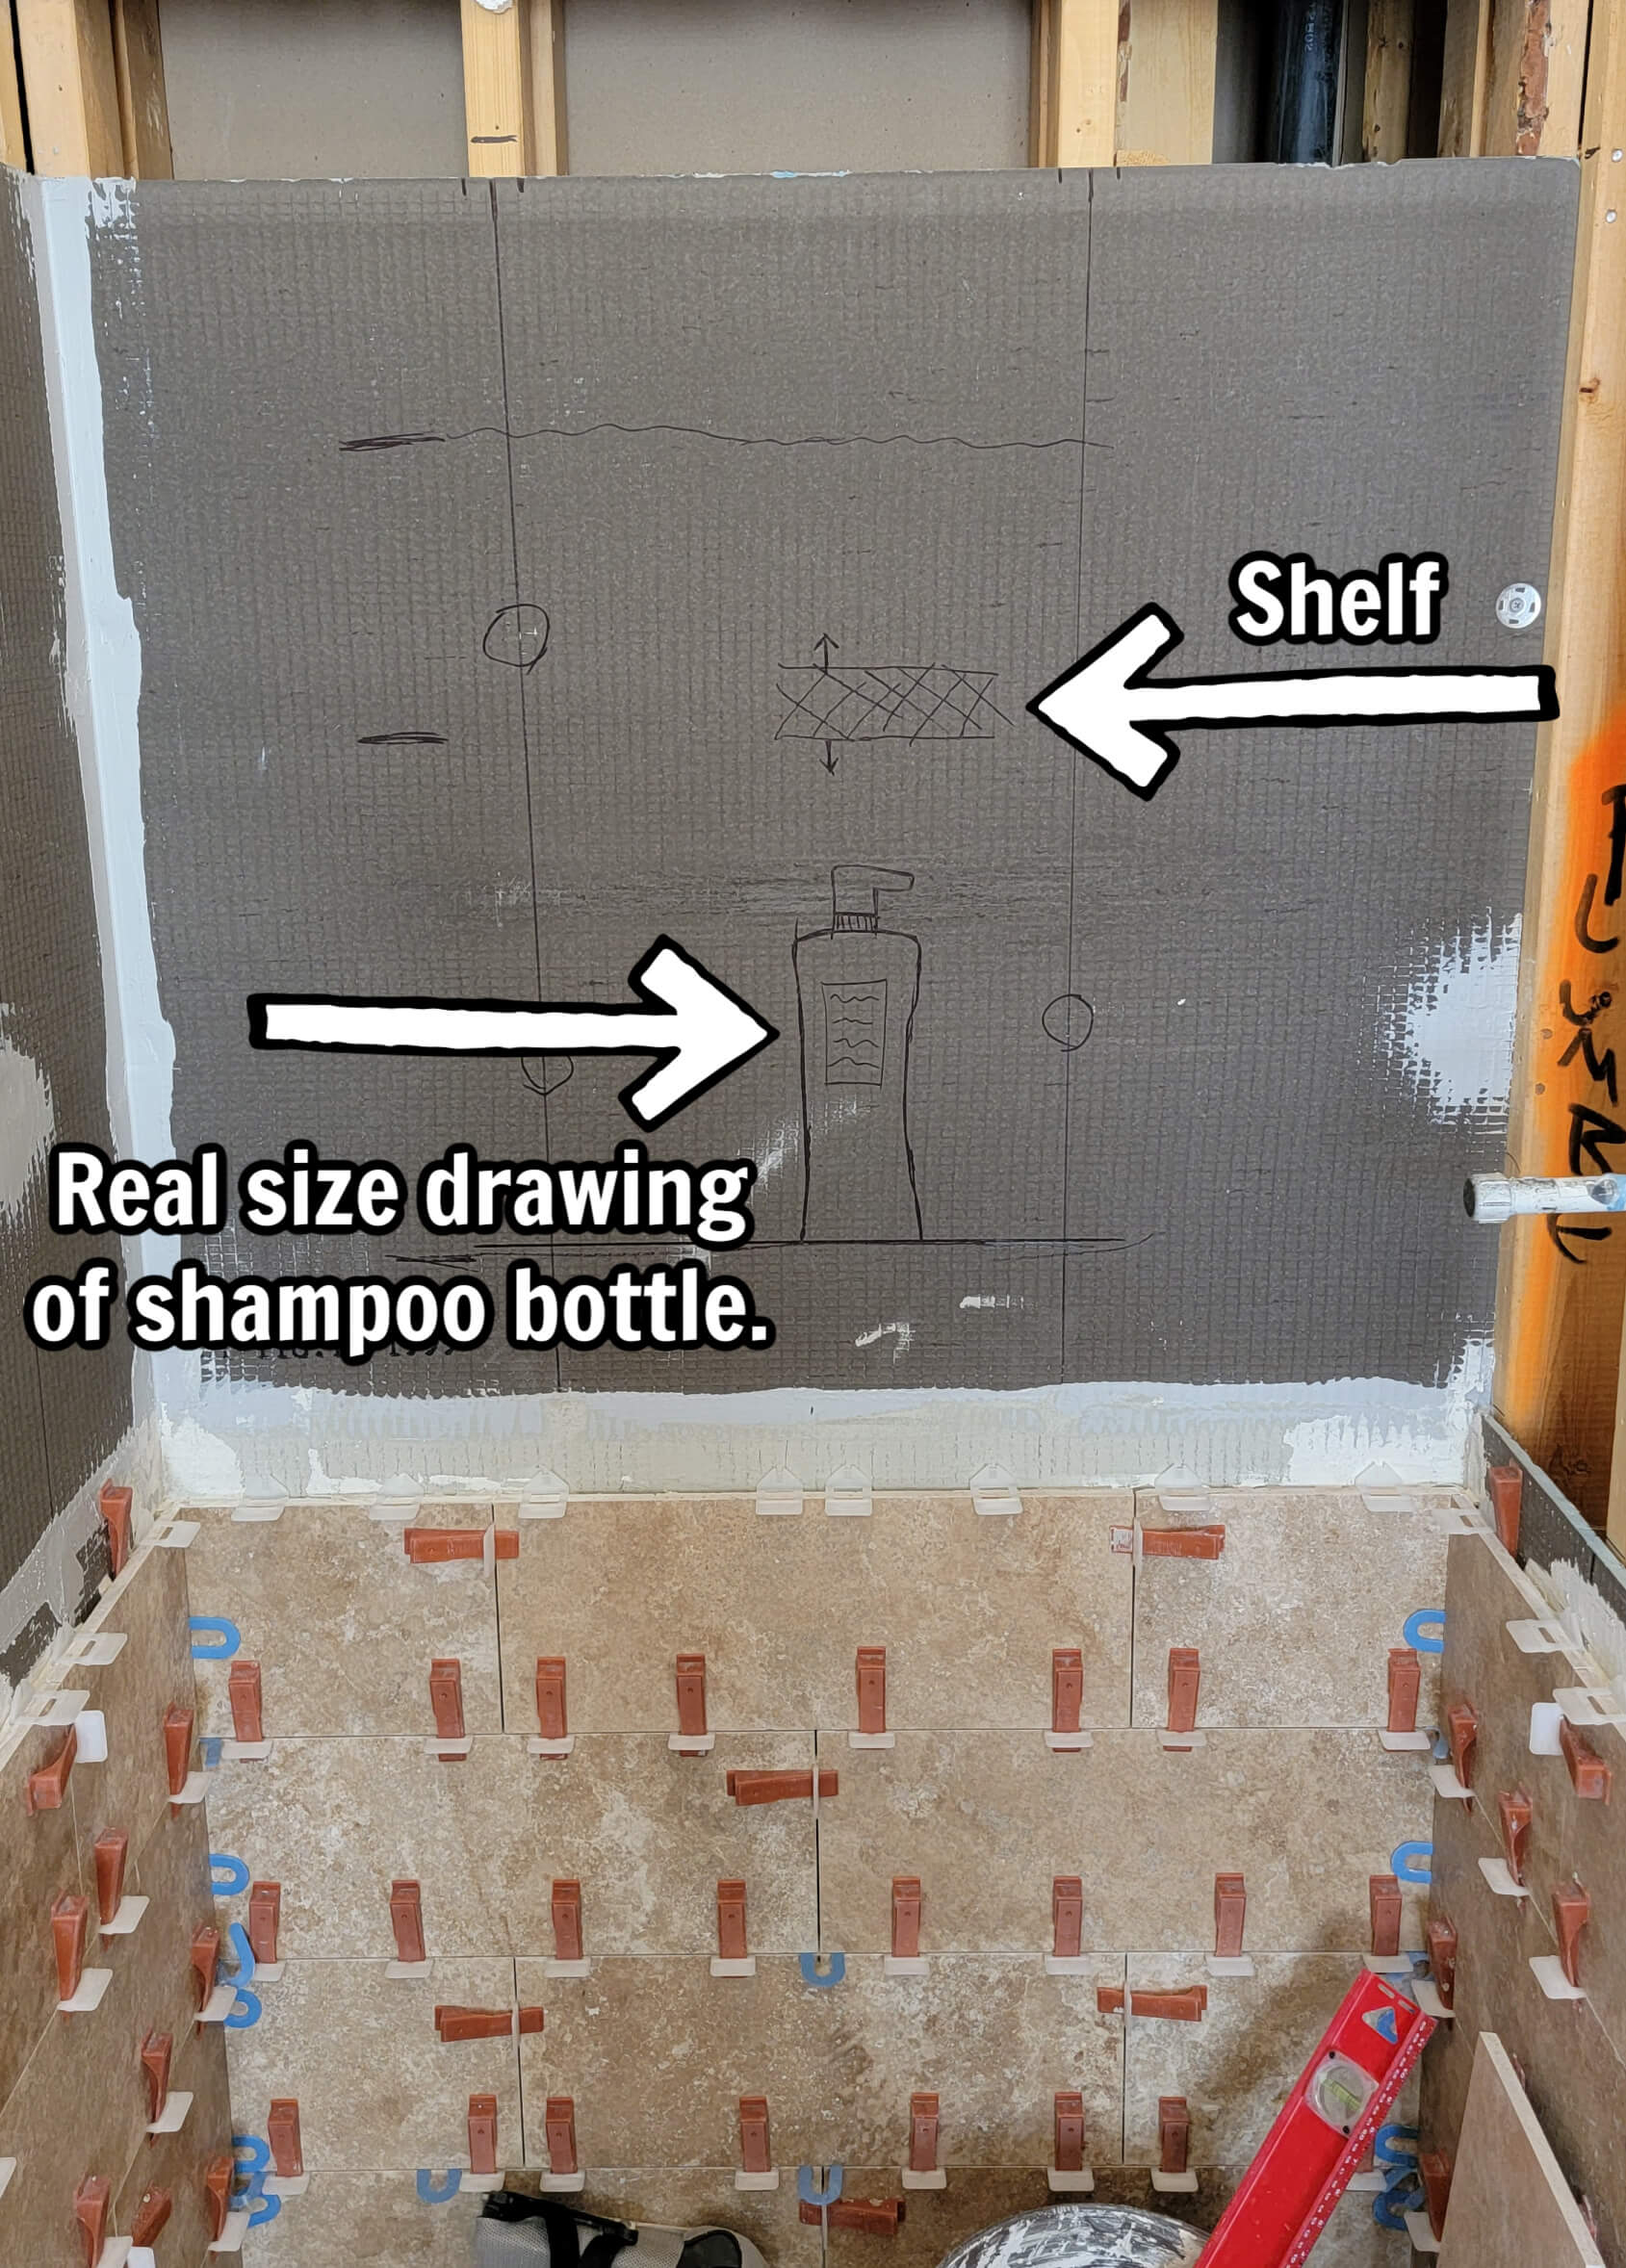 Shower niche planning on wedi board.
Here's the plan for the shower niche - the idea is to have another full travertine tile on top of the rows you see and then start the niche right at that full tile. Tile size is 8" by 20".
The shampoo bottle drawing is real size to give us the best idea on how tall the niche should be, also based on customer's preferences. The shelf was planned to be exactly where the top arrow shows.
Now it's time to cut the wedi board, build the wood framing inside the wall to support the huge and heavy niche, then wrap everything in wedi boards and use the sealant to complete the waterproofing.
Scottsdale Shower Remodel - 45° mitered travertine tile around niche and shelf
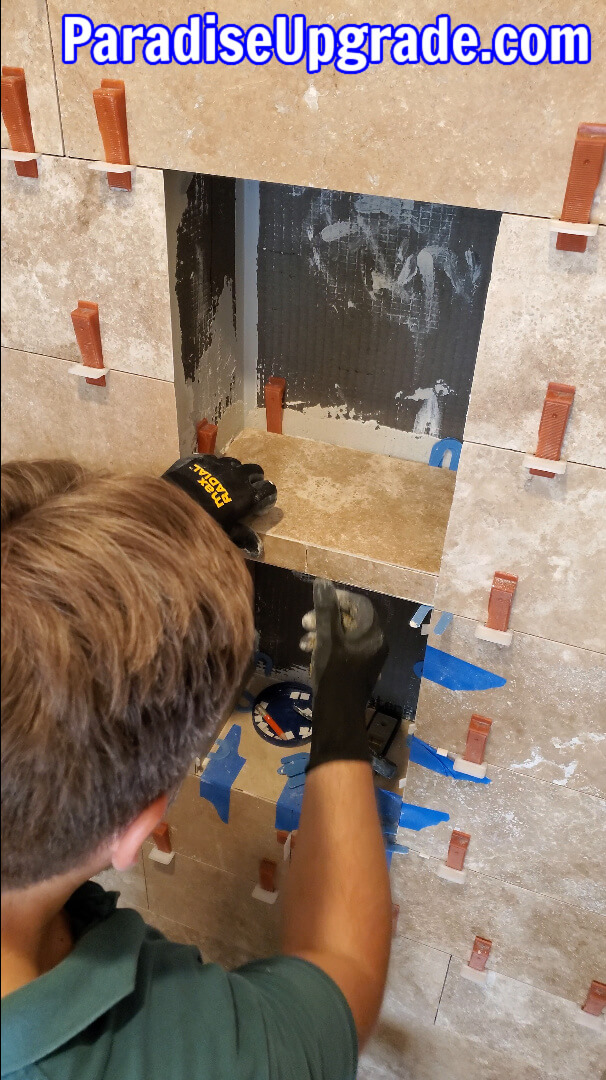 Custom travertine shelf & niche.
It's not quite obvious in this picture but all the travertine tiles around the niche are mitered at 45° so the spacers are consistent with the rest of the shower and the finished view will be at its best (no metal trim: Schluter, etc).
The same mitered edge was custom made for the shelf which is made out of 4 pieces of travertine: 2 pcs. for top and bottom and 2 pcs. for the front edge of the shelf.
Besides other means, the blue tape helps to keep the mitered tiles in place until the thin-set dries for a permanent hold/bond.
The wedges you see and the white clips are actually a tile leveling system called Raimondi. The white clips are also the spacers to help achieve a 1/16" gap between tiles in this case.
Scottsdale Shower Remodel - full tile at top and bottom of niche
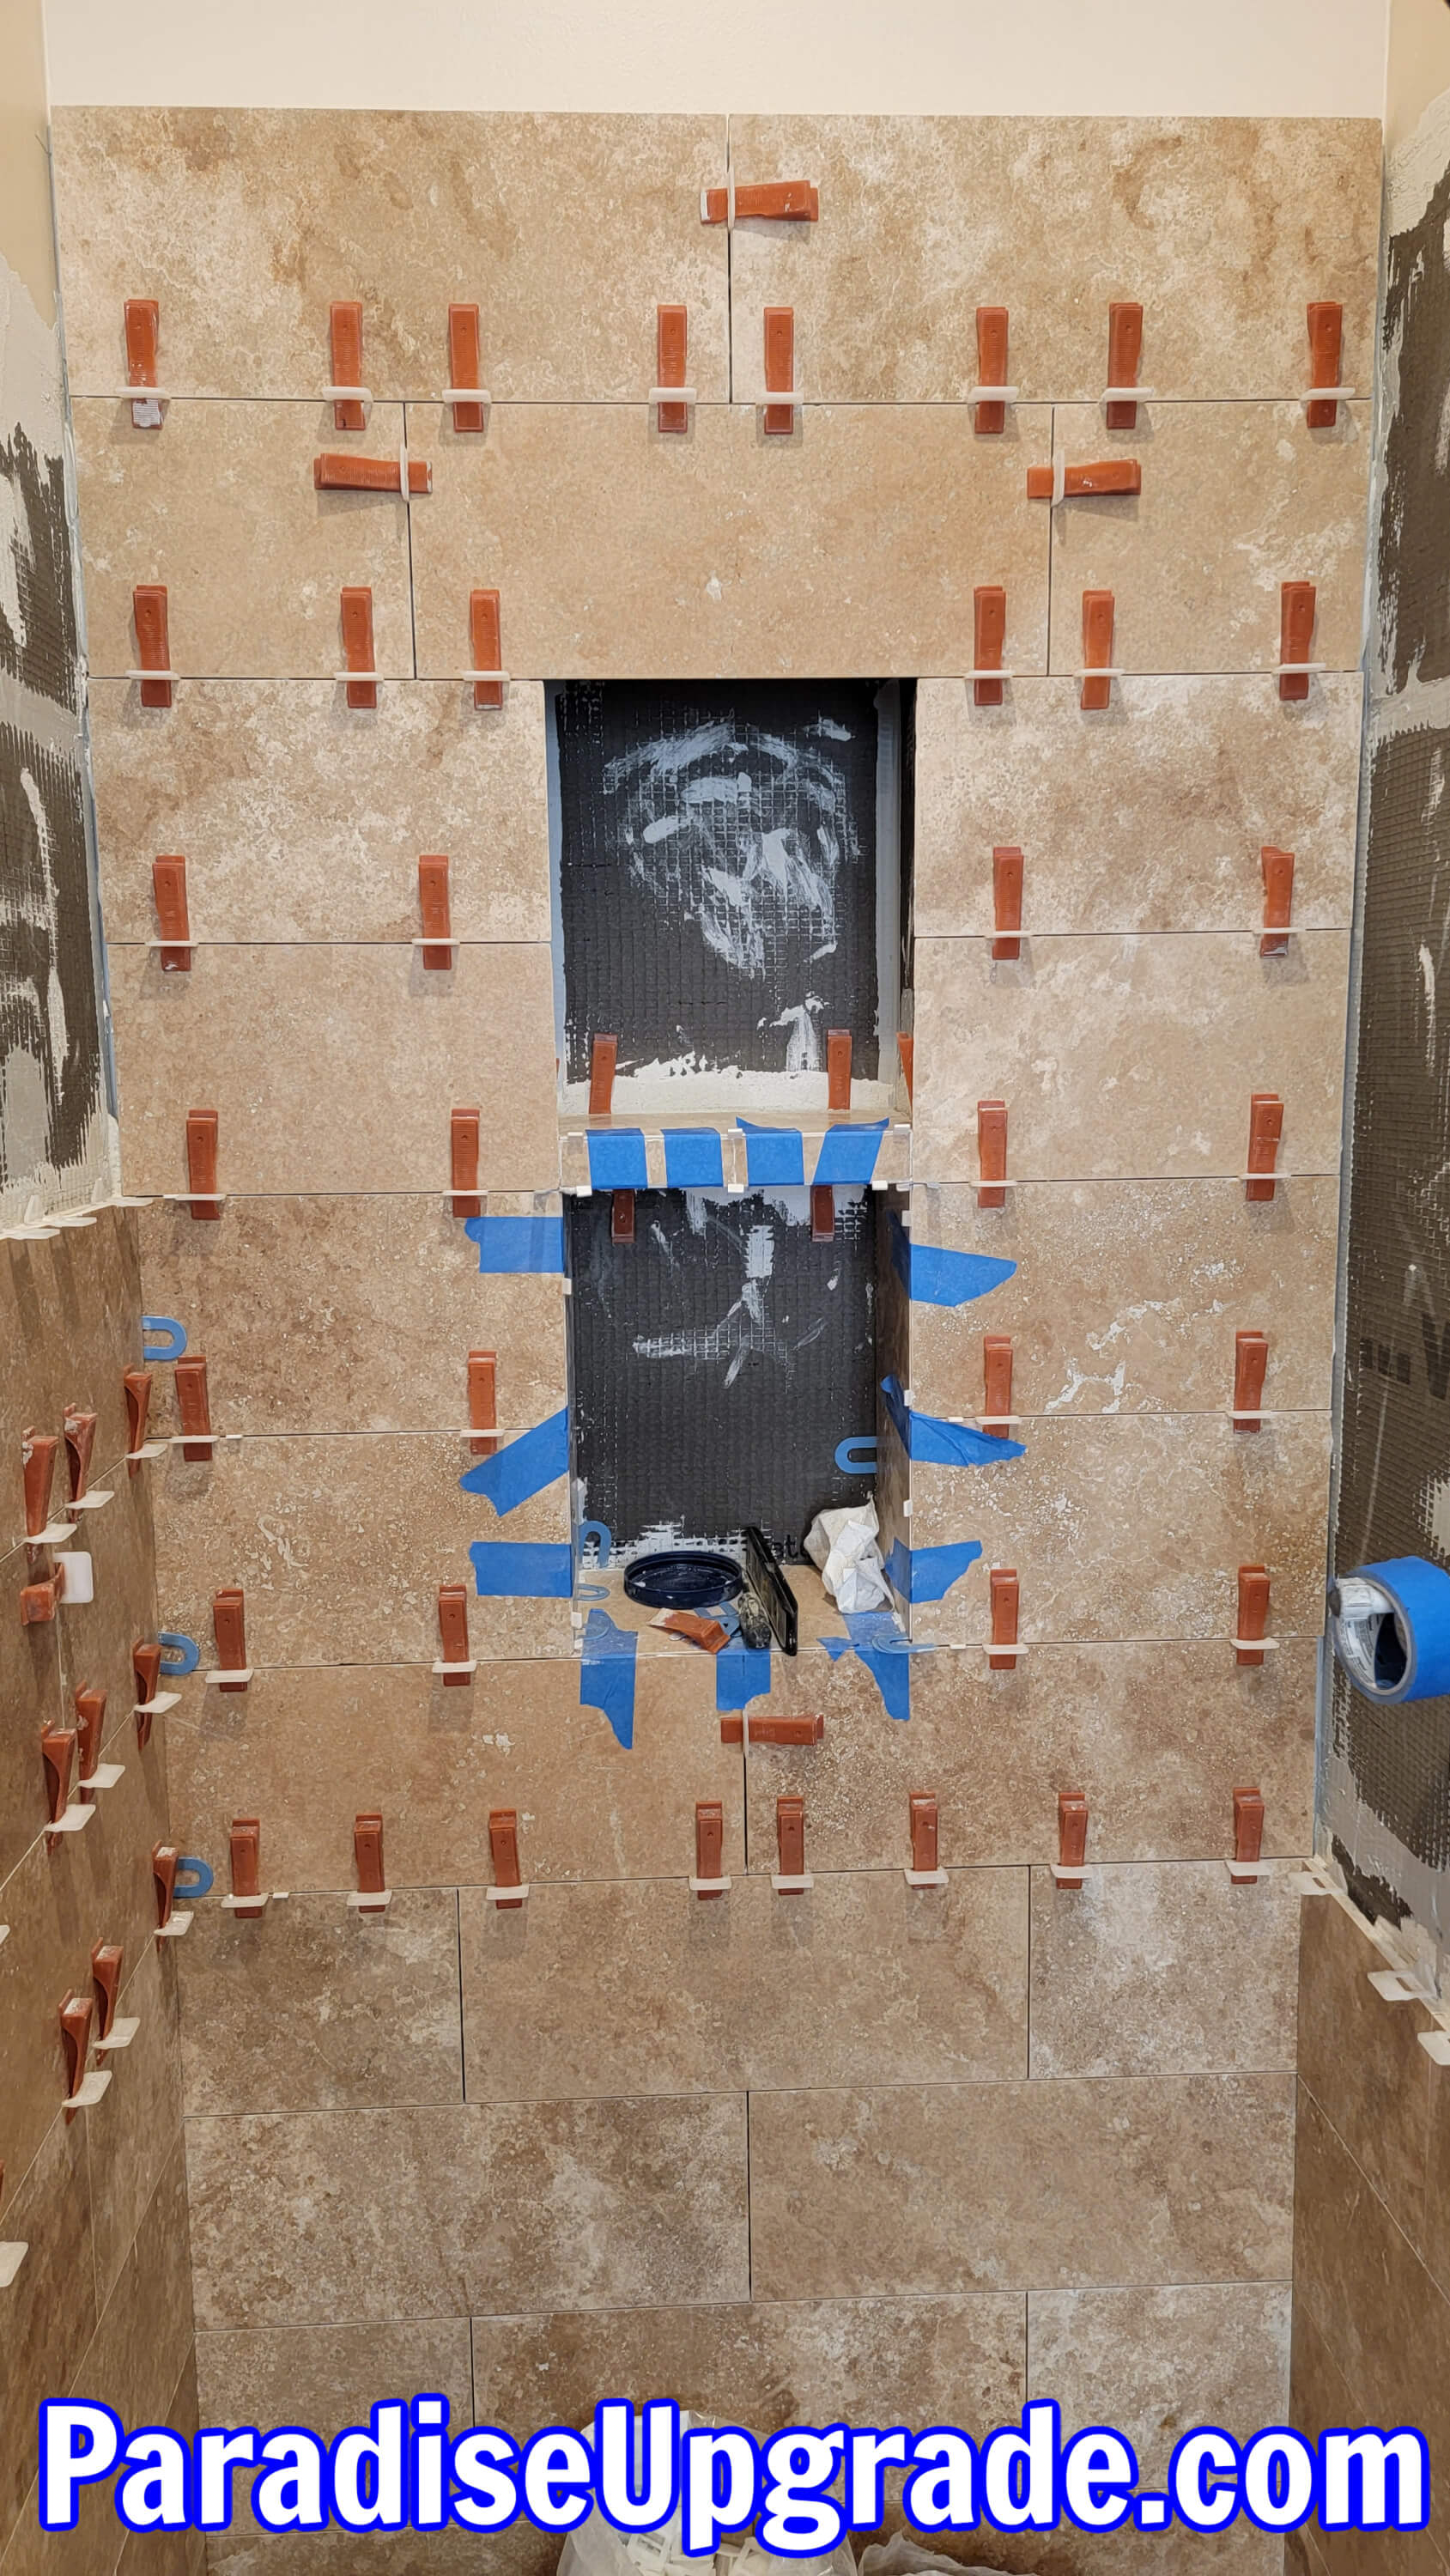 Travertine tile up to 7' 6" high.
A very customized feature is to have the niche start and end at full rows of tile. You can see a full row of travertine tile just below the niche and another full row of tile just above the niche.
This shower had the advantage of having a deep wall behind the niche so the customer decided to have a deep niche at around 8".
Both the bottom of the niche and the shelf, are sloped enough so the water won't pool in the back of the niche but run out.
The back of the niche will get flat pebble tile exactly like the ones we'll be installing on the shower floor.
The last row of tile up on the wall is at a height of around 7' 6" (~2.3 meters).
Scottsdale Shower Remodel - flat pebble tile on shower floor
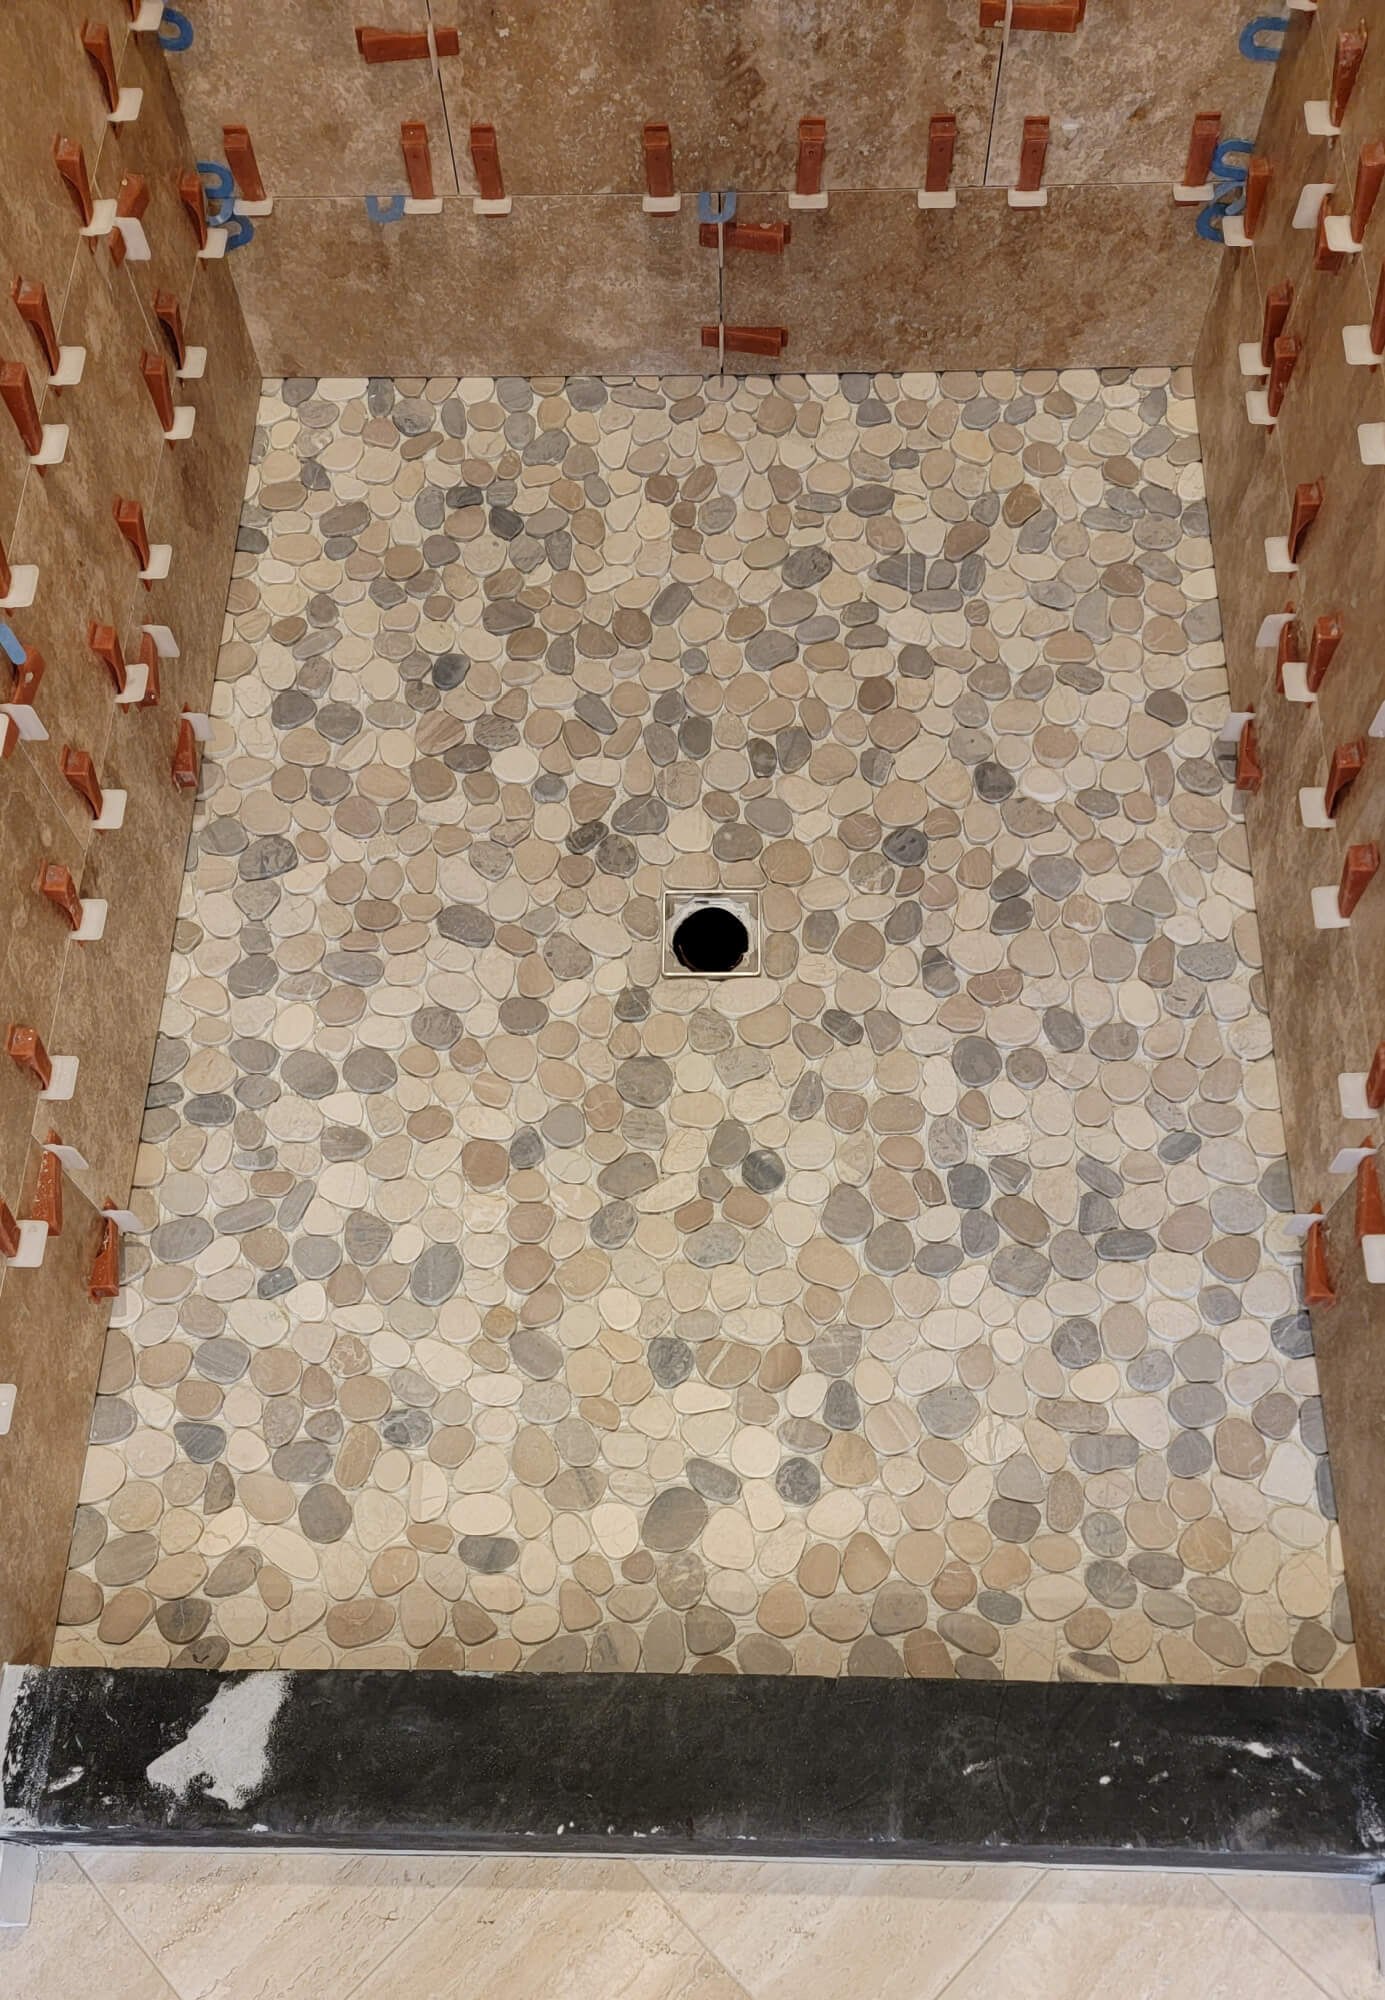 Flat pebble tiles on shower floor.
Here's a view of the shower floor that got flat pebble tile installed but are not grouted yet. These pebble tile came in sheets and the decision was made to remove each and every pebble/stone off the sheets and install each stone one by one. Why?
Because some of the stones on the sheets were literally touching other stones - which means no room for grout to get in those specific areas BUT water could seep down and cause damage in time.
Installing each and every stone by hand, meant that no stones were touching and there was a gap all around each stone so grout can get in there.
Scottsdale Shower Remodel - travertine tile 7.5 ft high
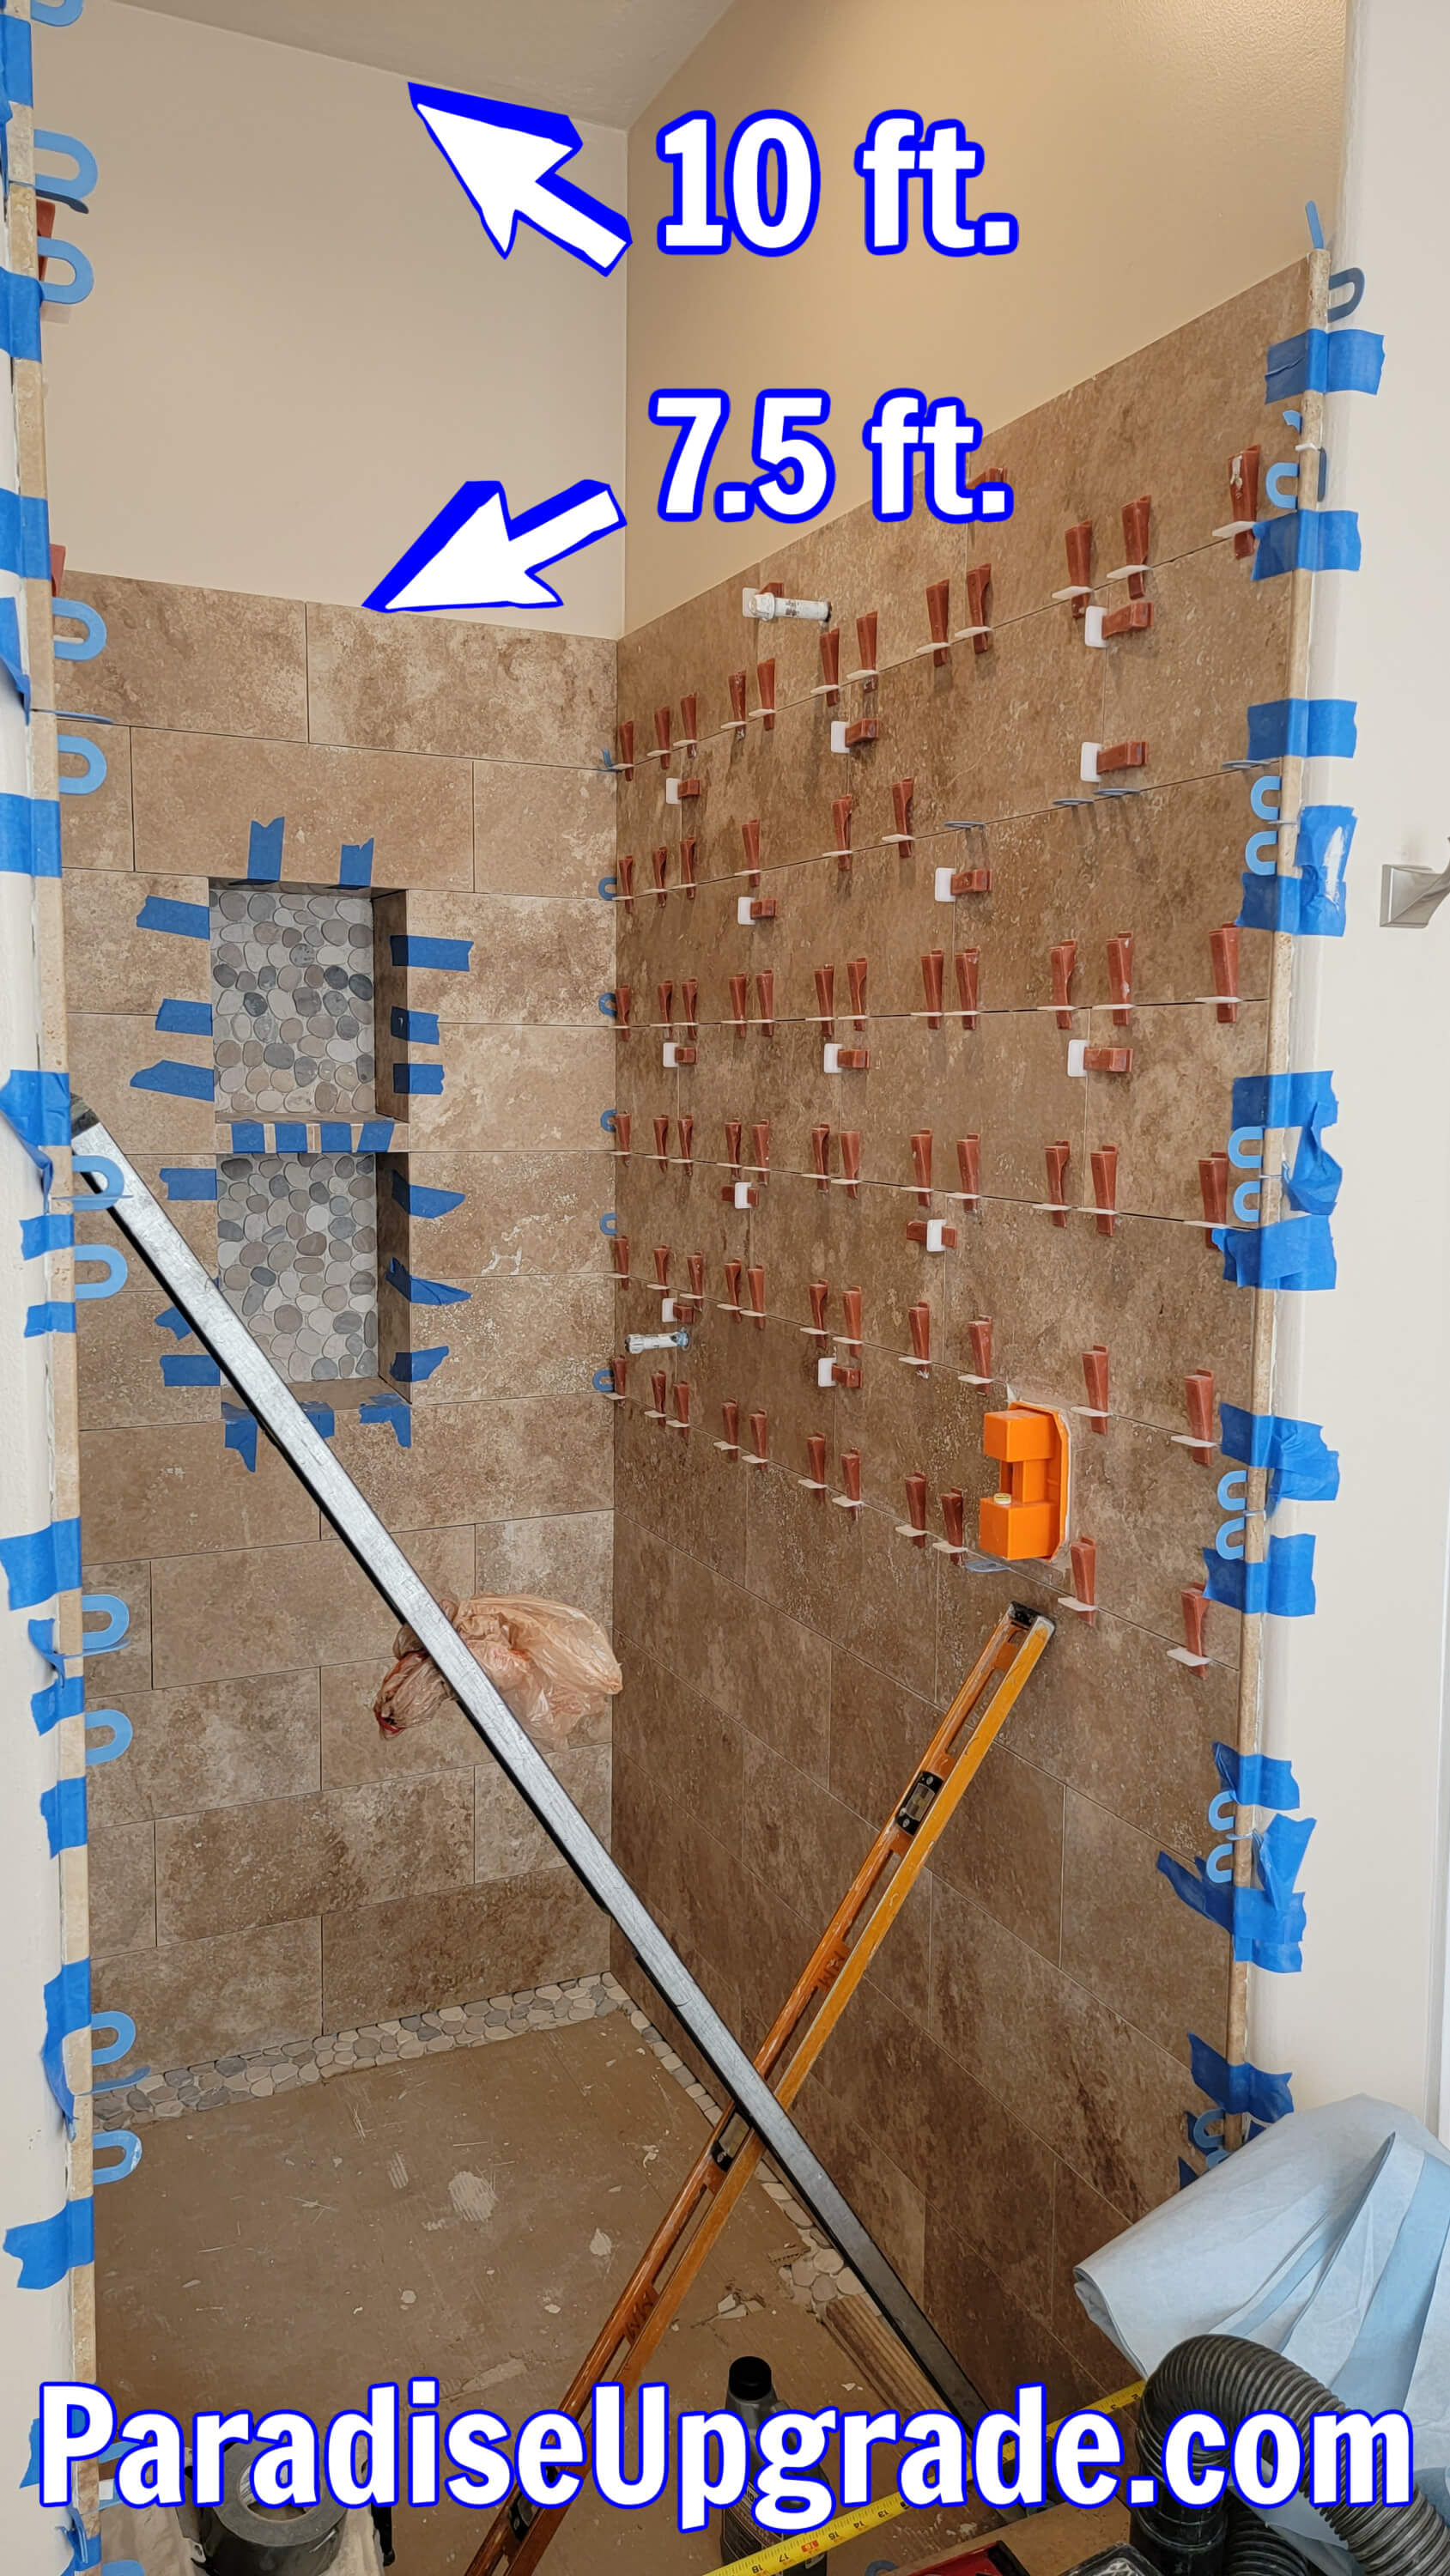 Tape and spacers hold thin pencil tile in place till adhesive dries.
This particular house has 10 ft. high ceilings and the travertine tile was installed up on the walls to about 7.5 ft high.
The purpose of the painter's tape you see on the 2 vertical sides is to help keep in place what's called the pencil tile.
This pencil tile is a rounded trim of the same material as this tile (travertine) that is either used as a decorative tile or as a trim to cover and finish the side of regular tile. Each pencil is 12 in. long and they run from the bathroom floor to the top of the walls.
After everything dries overnight, all this travertine tile and the pebble tile will be sealed with 2 coats of a specific sealer to protect the tile and prevent any stains that may be caused even by the grout - during grouting.
Scottsdale Shower Remodel - shower grouting done
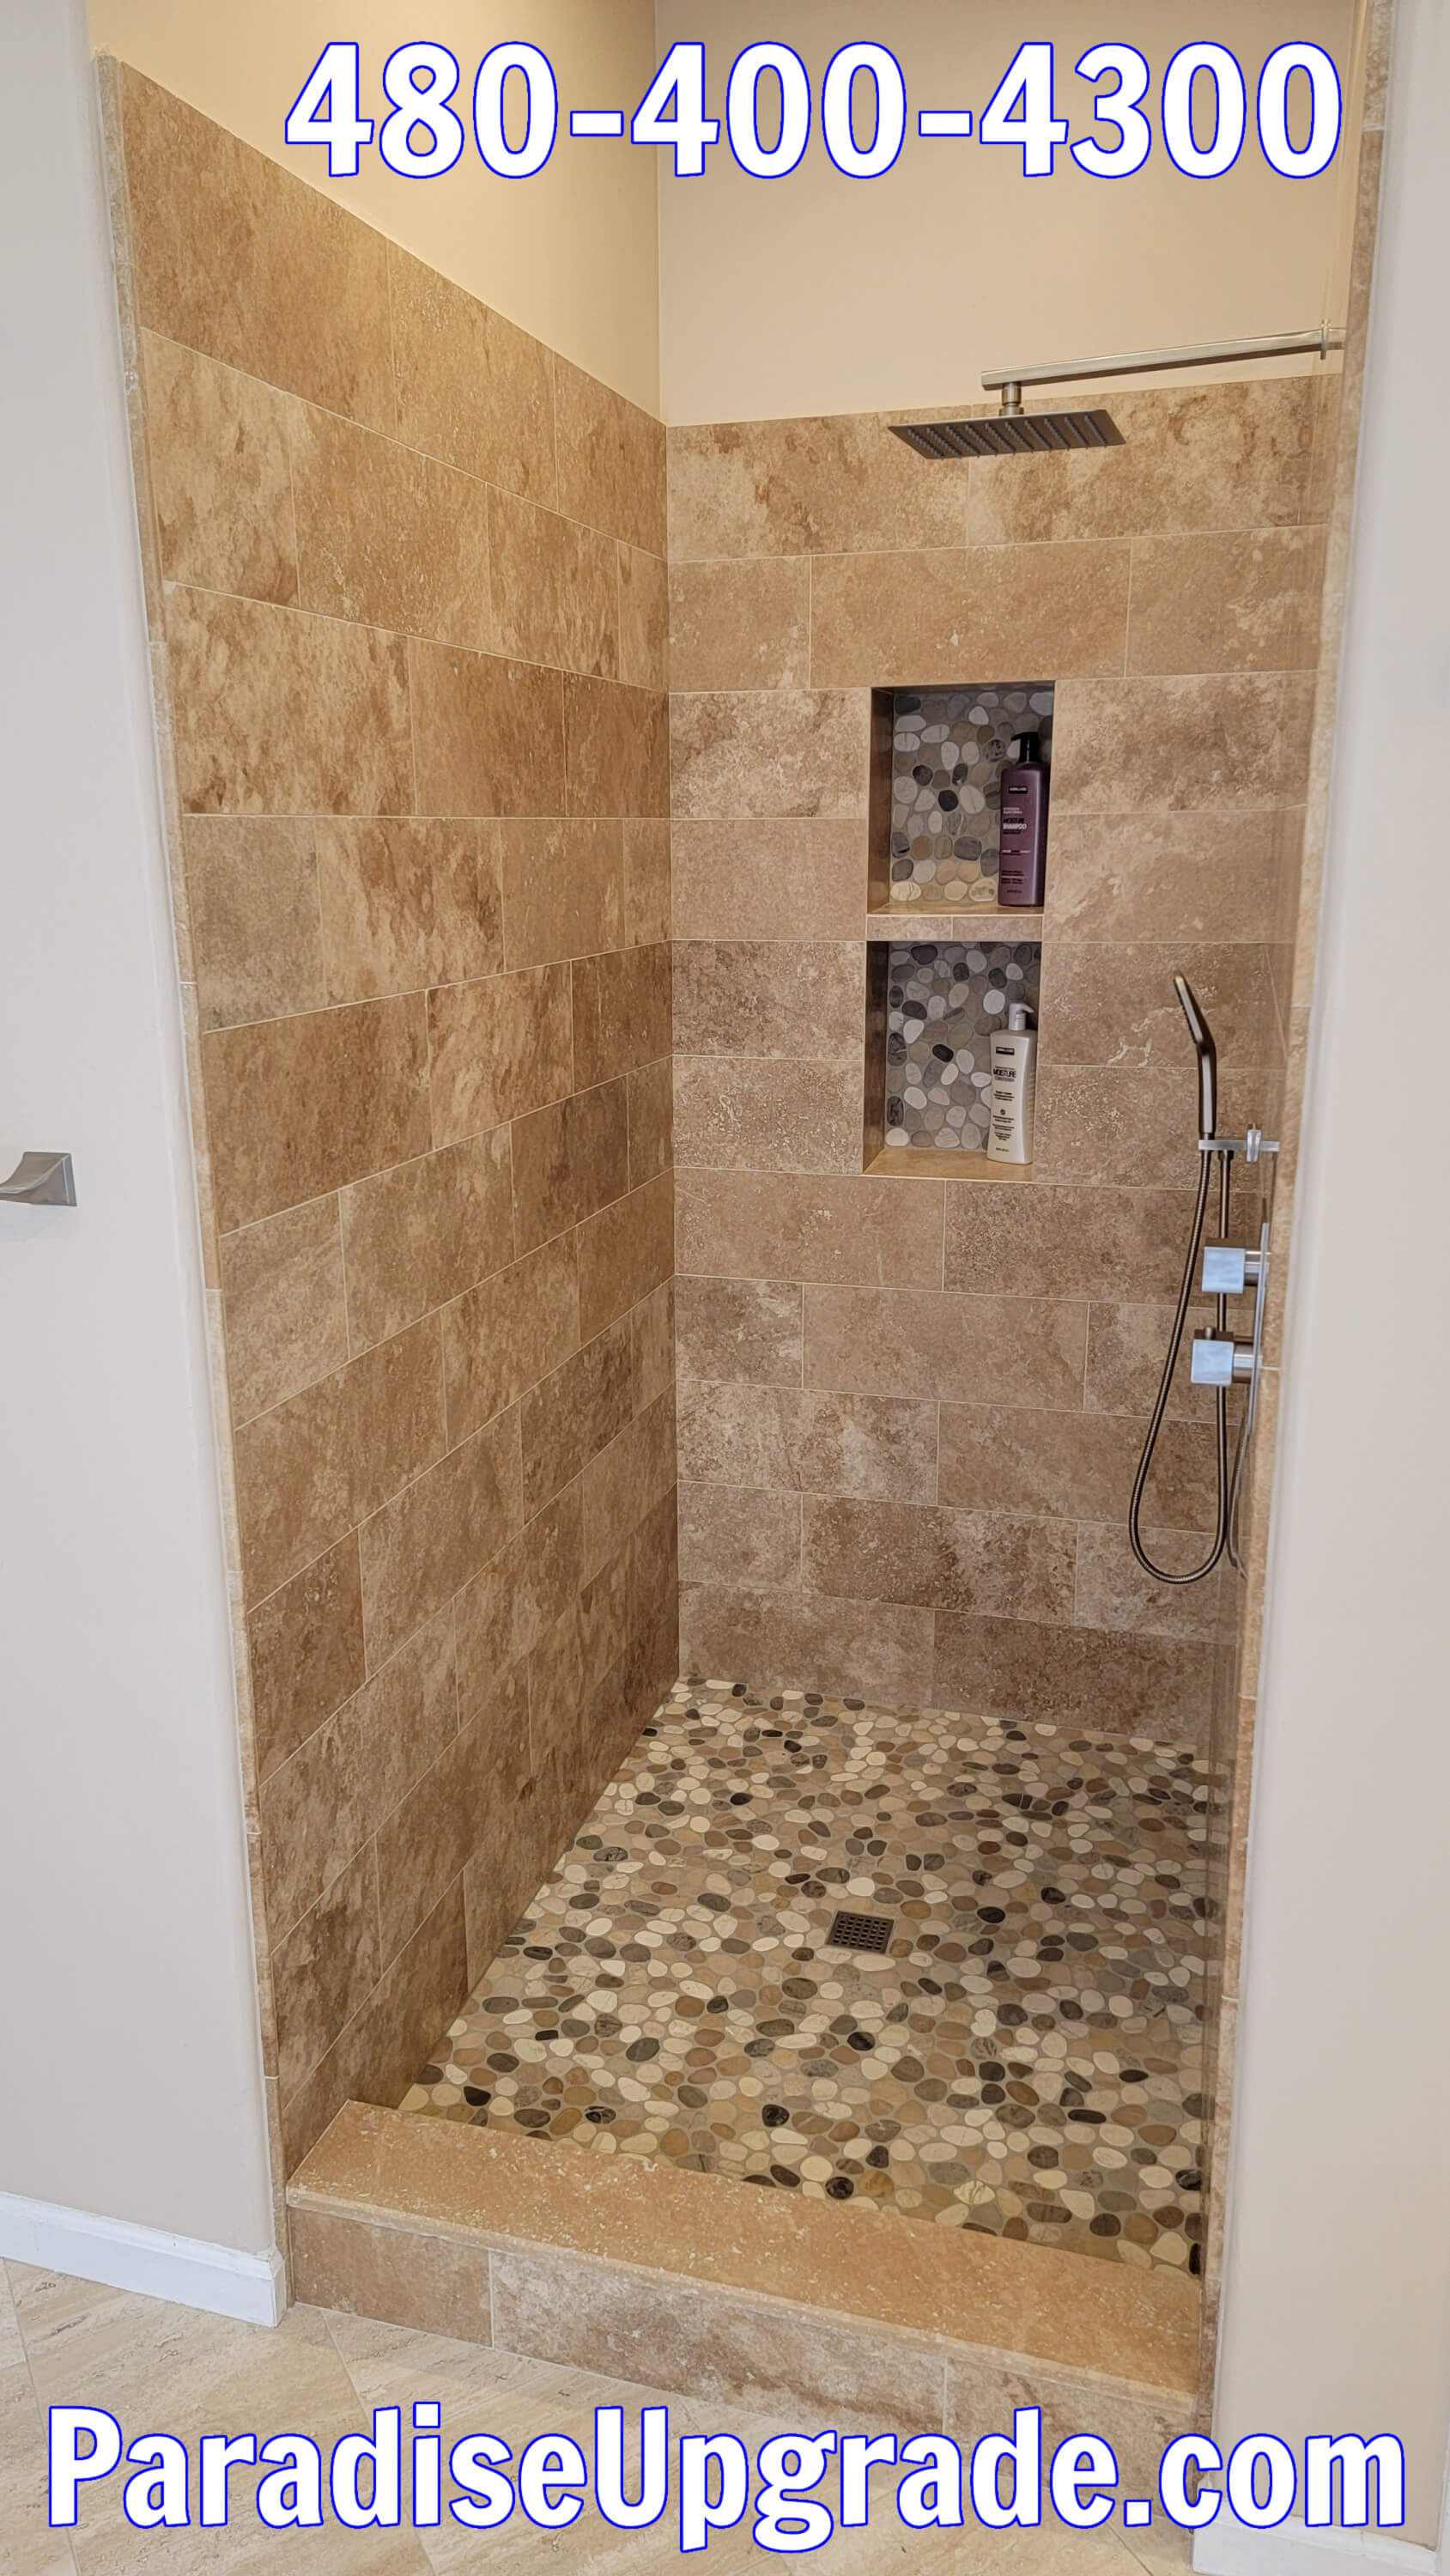 Shower tile and grout - done.
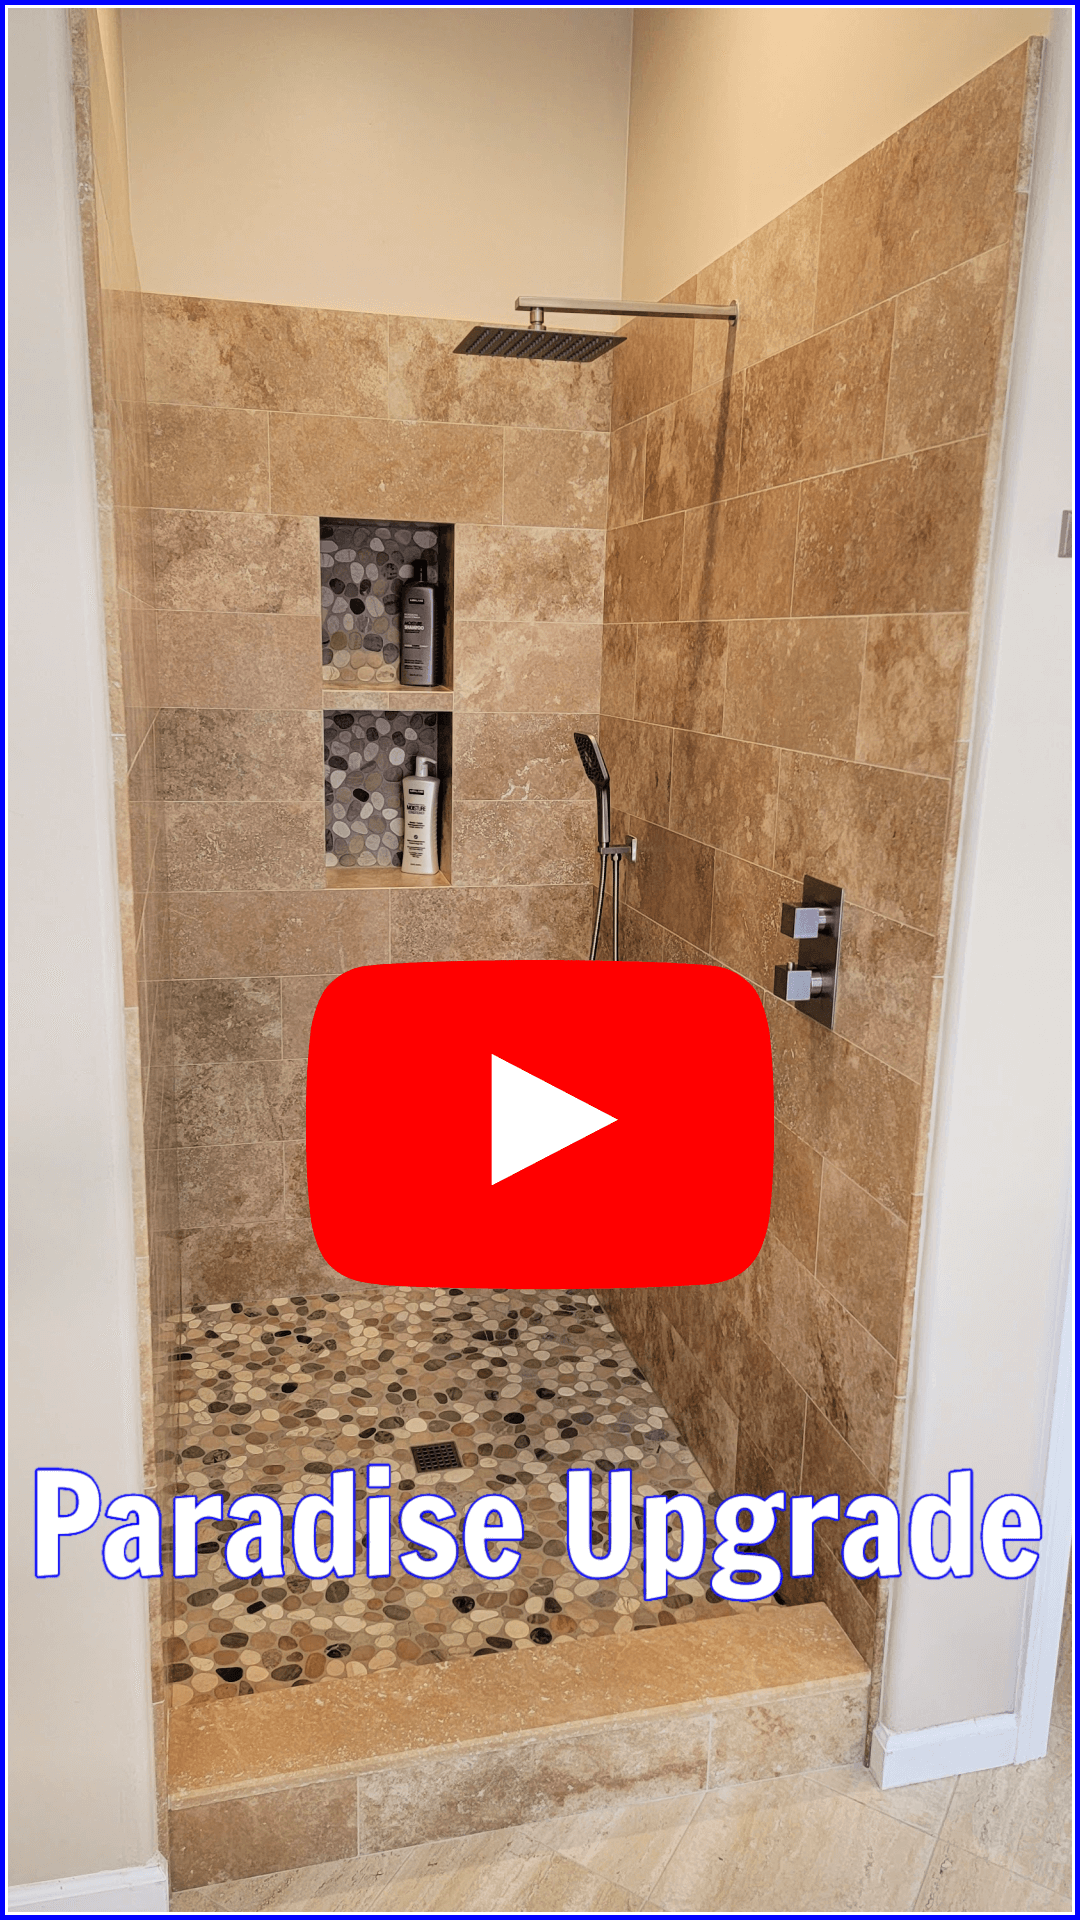
The new shower is finally ready - except the frameless glass door and a panel, which will come later.
There is way more work to actually renovate a shower than what was shown in these pictures but this will give you a rough idea of what's involved and what to expect when your own shower will go through this type of remodel.
The niche sizes are as follows:
-depth: 8 inches
-left to right: 12 inches
-top area height: 14 inches
-bottom area height: 16 inches
The back of the niche got the same pebble tile installation as the shower floor. All pebbles were grouted with epoxy grout. The travertine tile got a different type of grout and it's stain resistant.
Scottsdale Shower Remodel - glass door and panel
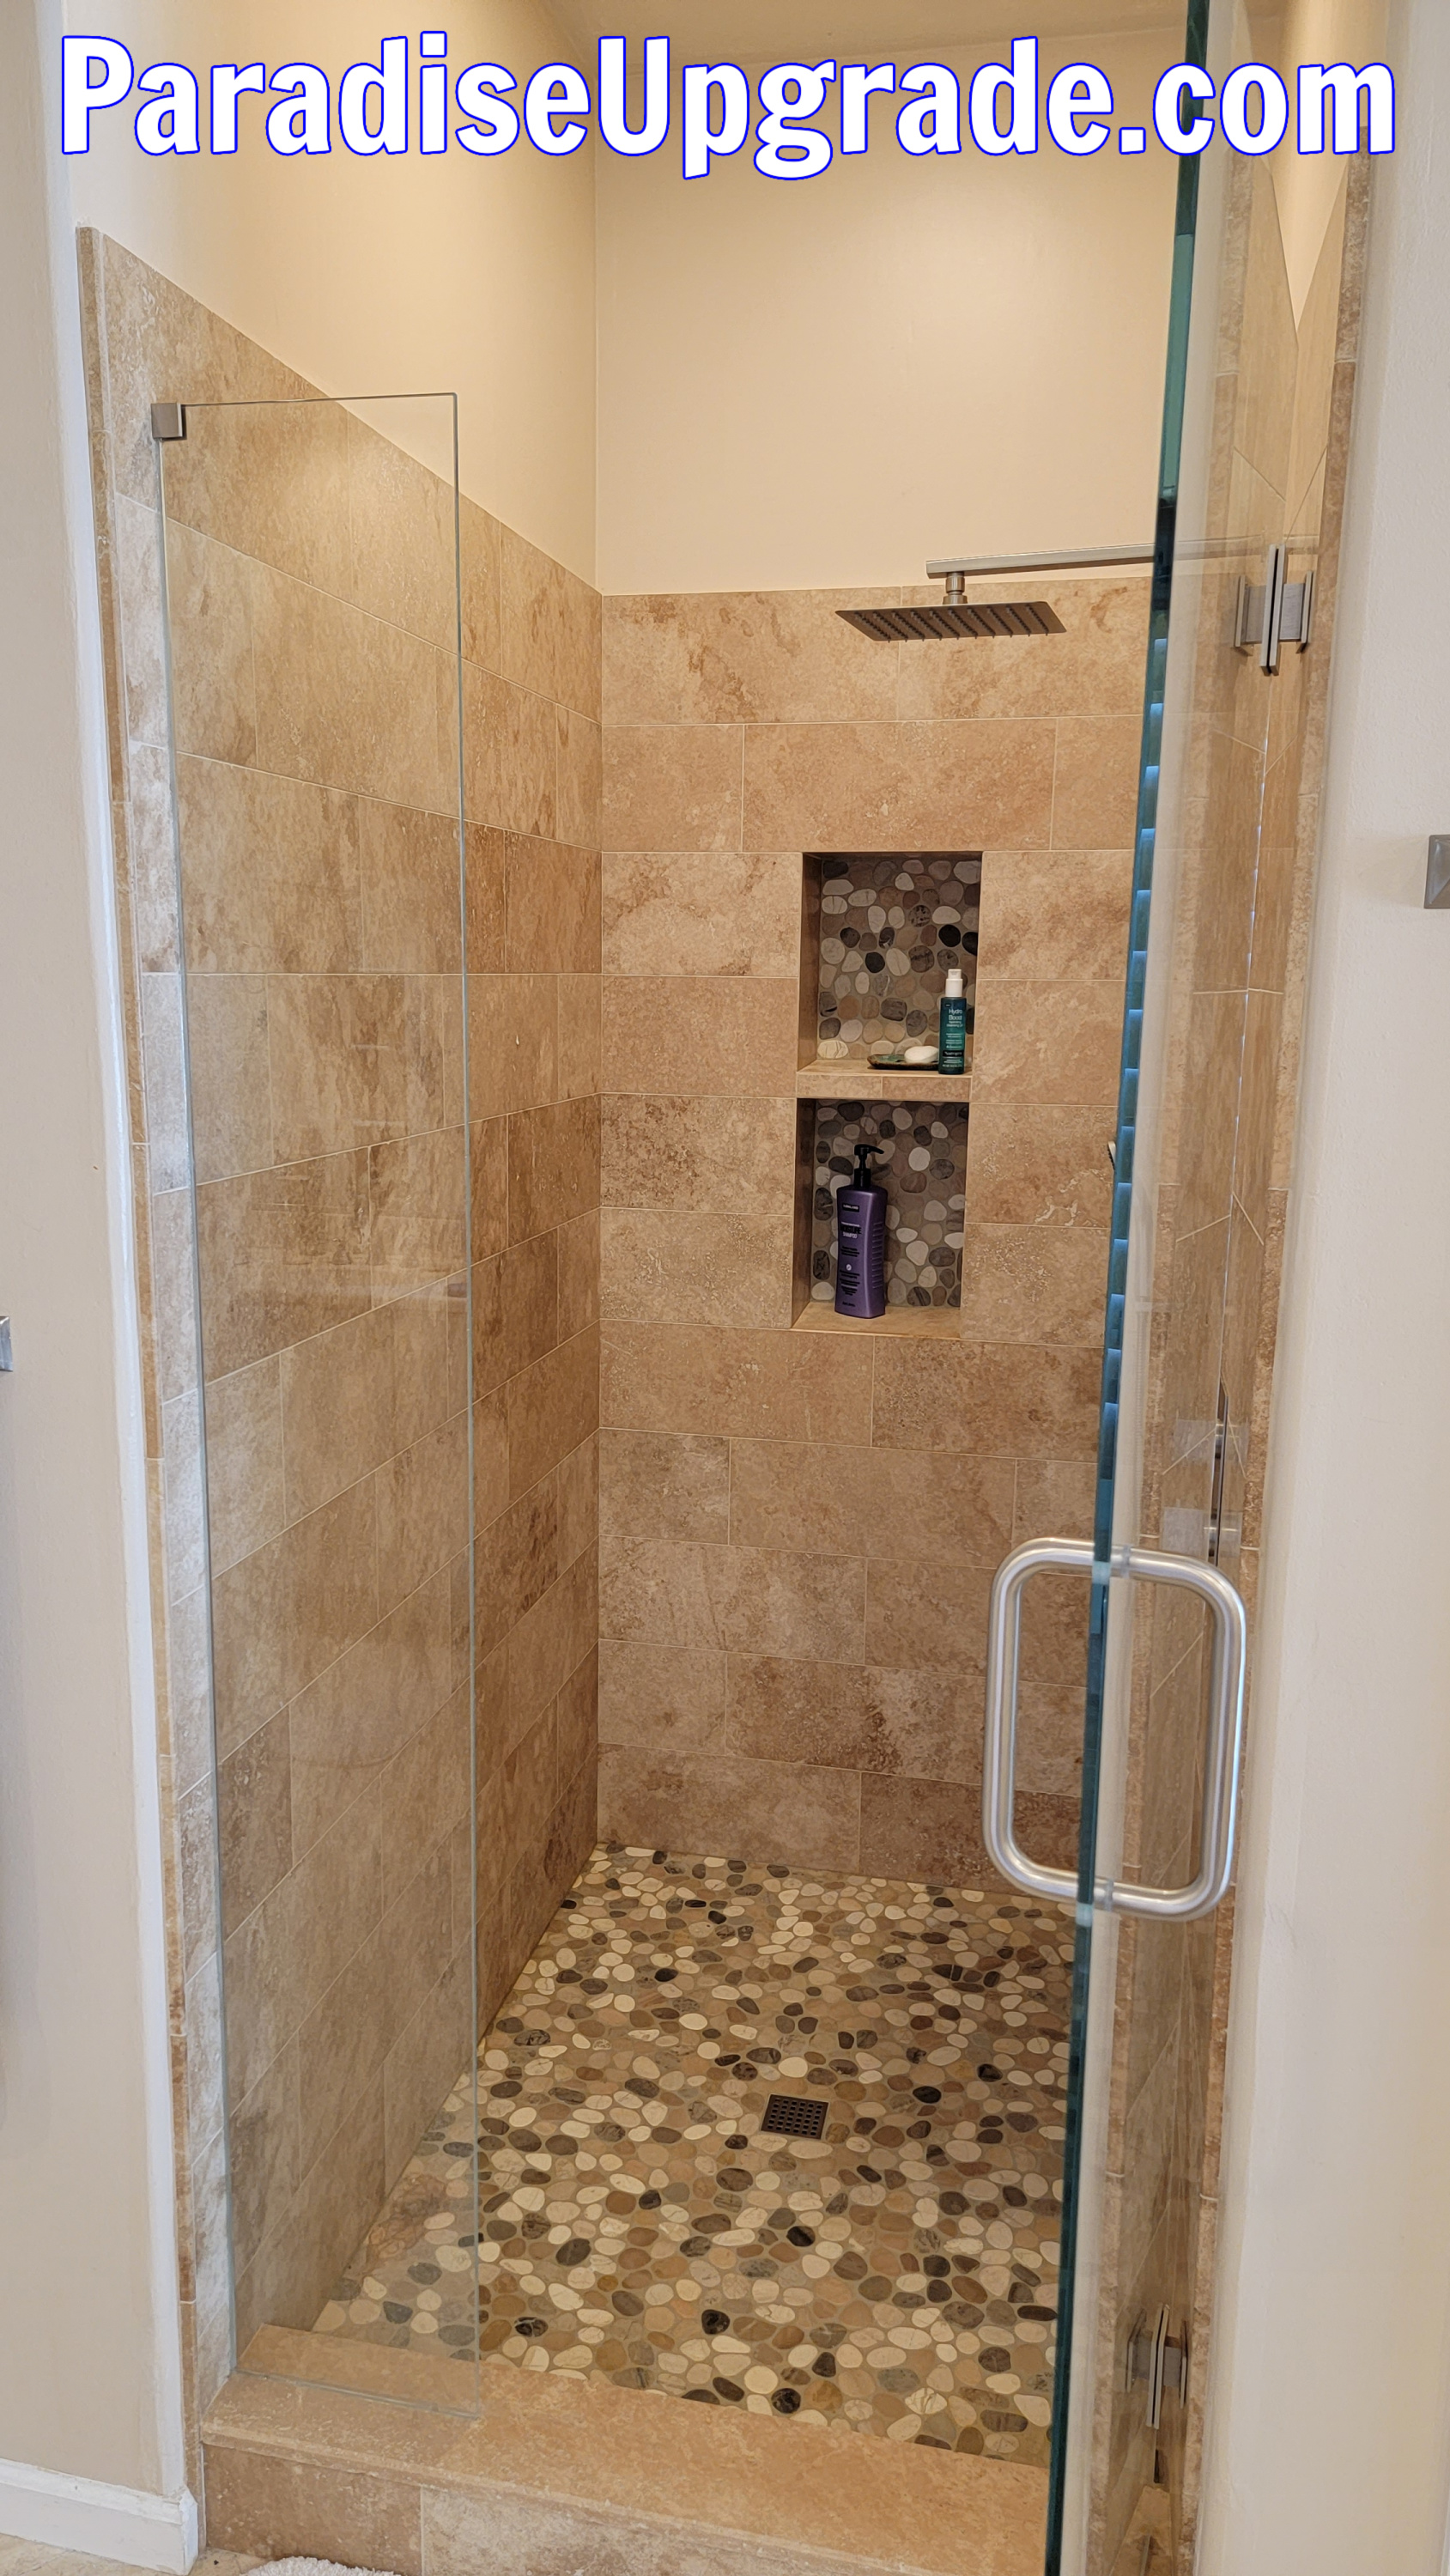 Shower glass door and panel.
The last step was the shower glass door installation and a small glass panel you can see on the left side. This frameless shower door swings both outside the shower and inside, so you can choose which way to open the door.
The shower faucet is within reach so you can turn the water on without stepping in the shower. You can easily switch between the rain head or the hand-held device at any time.
The custom shower niche gives you plenty of room for your shampoos, conditioners, etc.
To start the process of remodeling your current shower into your dream shower, call/text Mark at 480-400-4300.
Serving areas in Paradise Valley, Cave Creek, Carefree, Fountain Hills, Rio Verde, Glendale, Peoria, Phoenix, ...
